mac+PhpWebStudy+xdebug
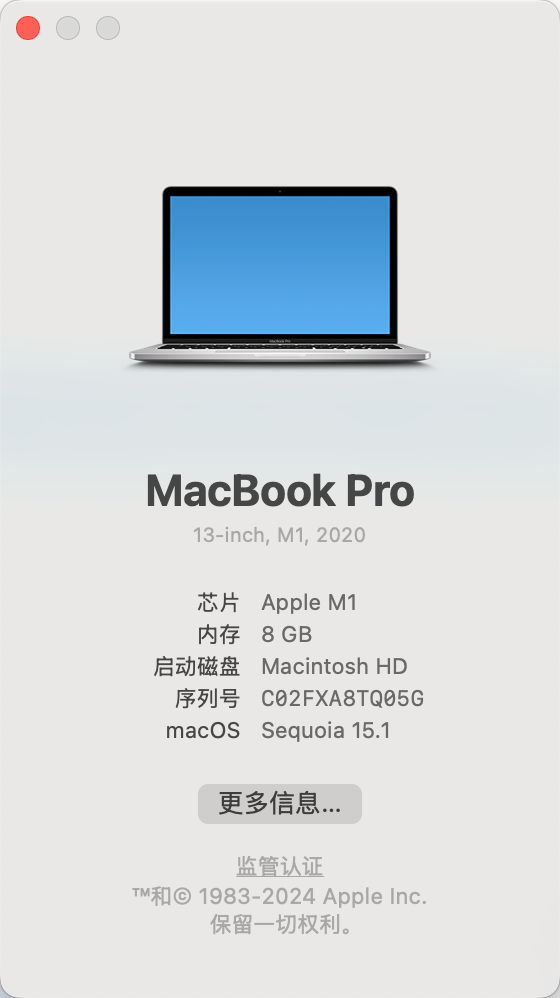
笔记本系统
安装flyenv
PhpWebStudy 改名为 flyenv
官网下载
https://flyenv.com/download.html
GitHub下载
https://github.com/xpf0000/FlyEnv/releases/tag/v4.10.5
mac m1 下载 FlyEnv-4.10.5-arm64.dmg
双击安装到mac上
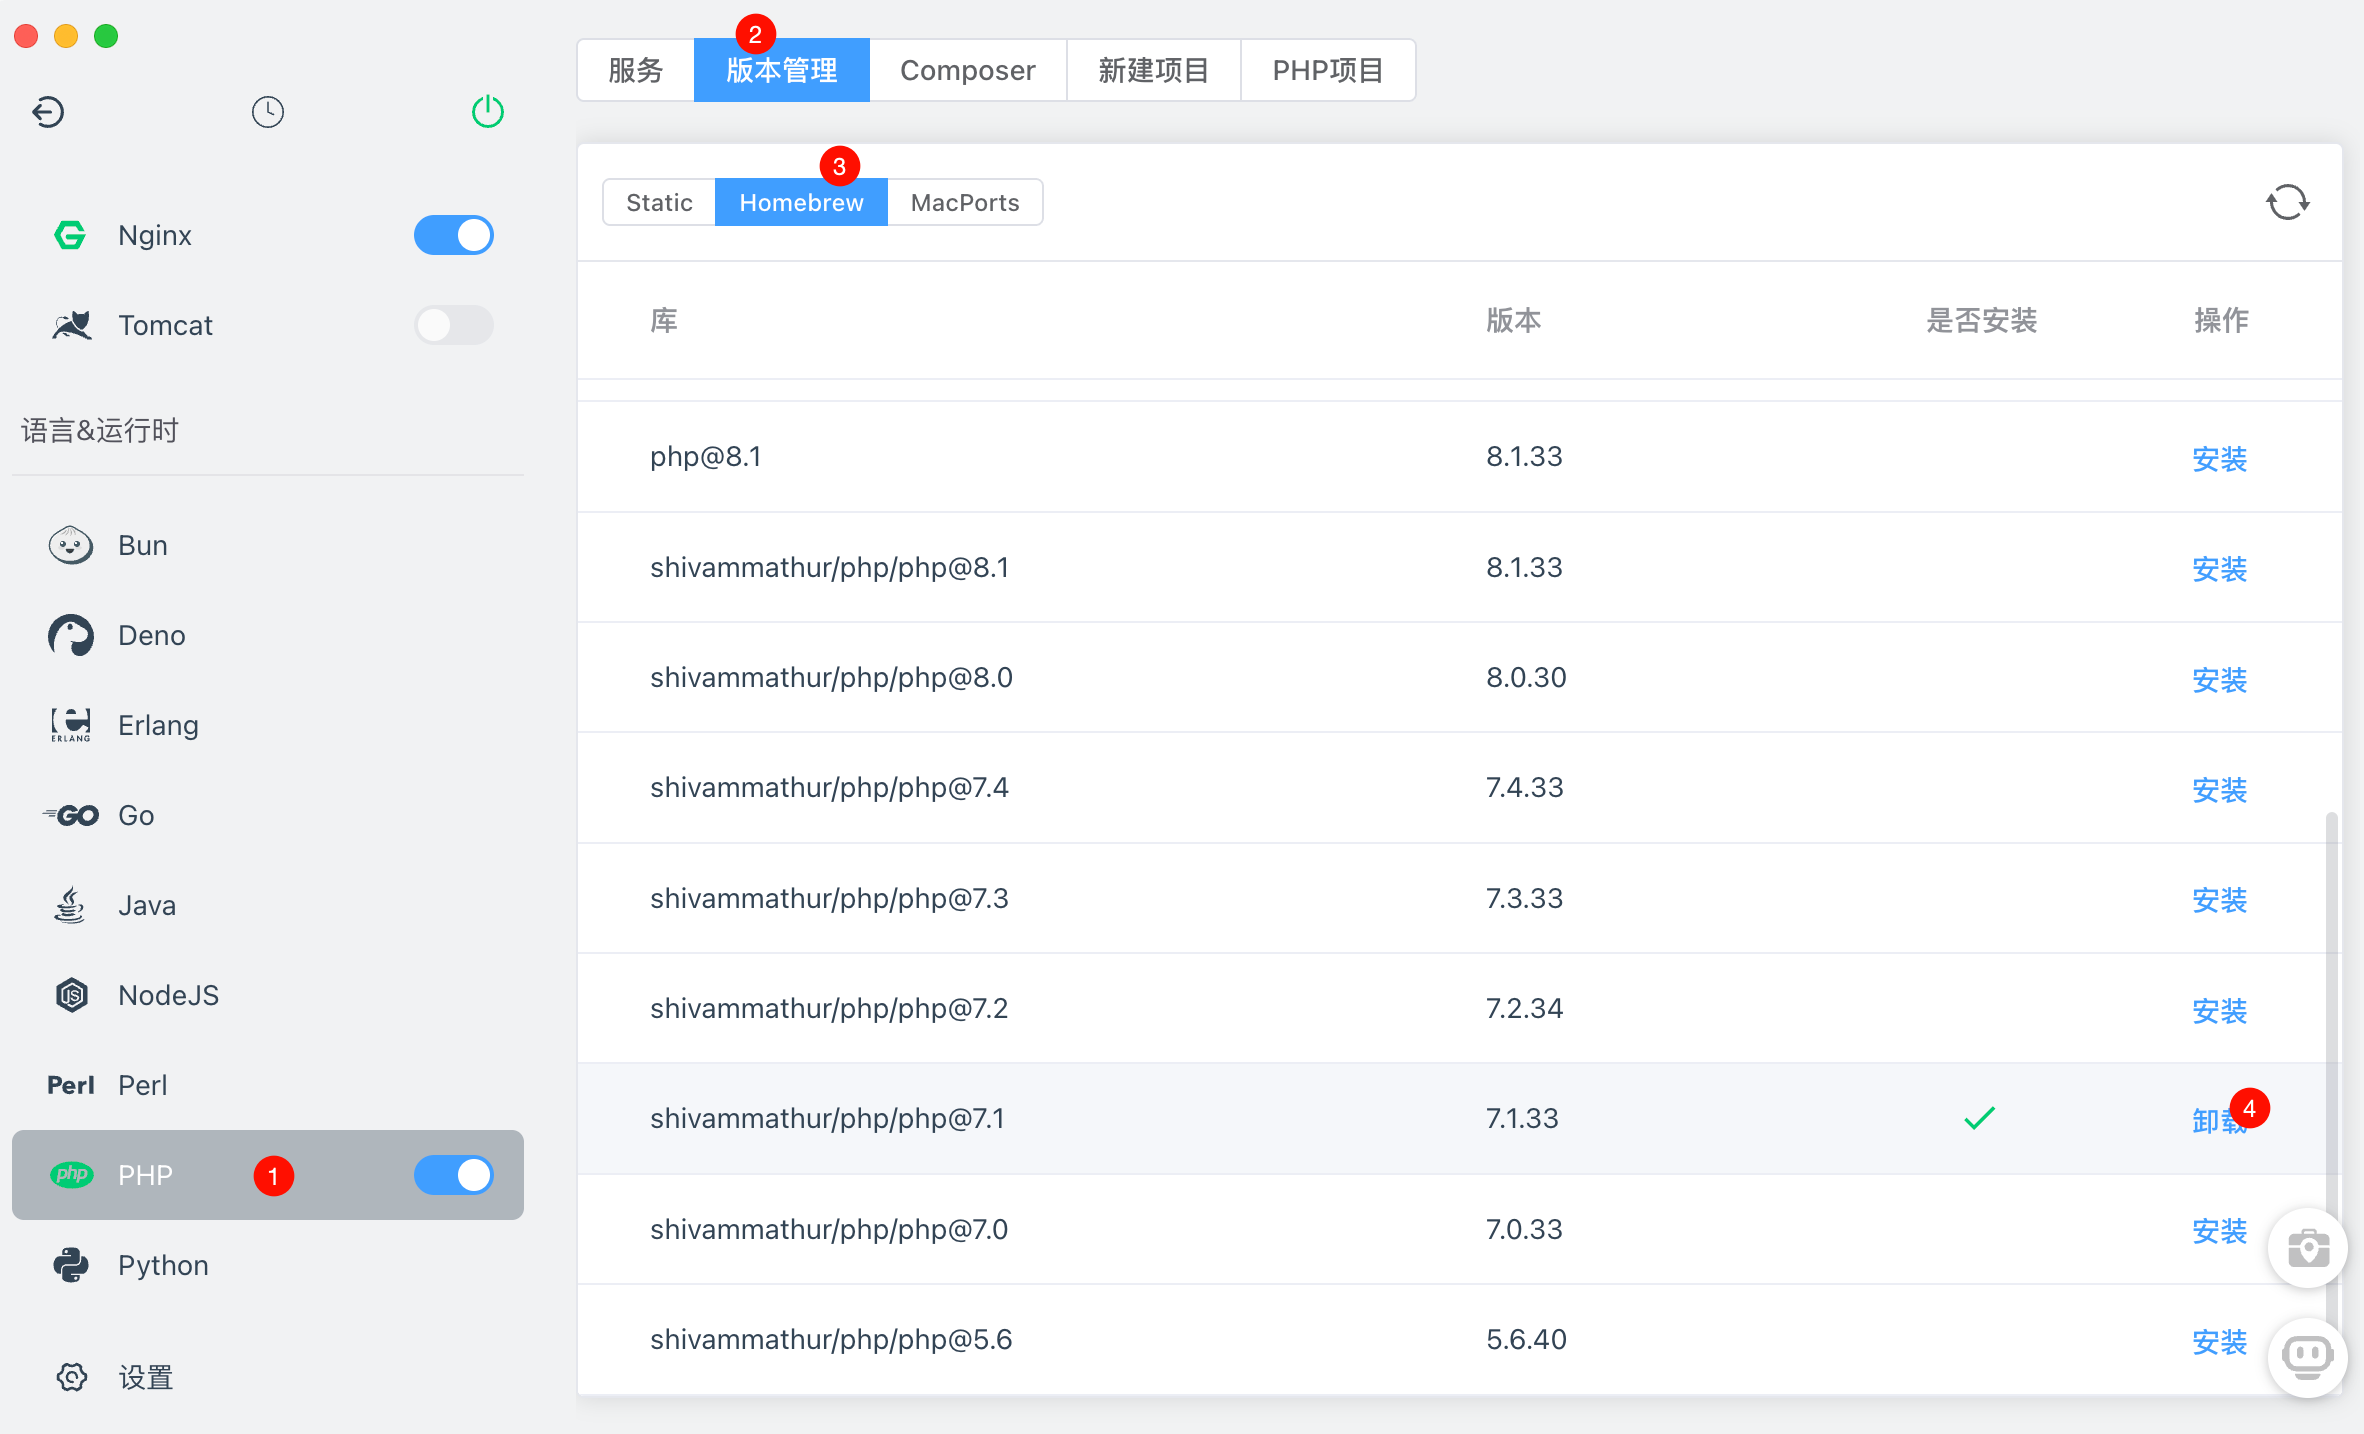
安装php
- 安装php
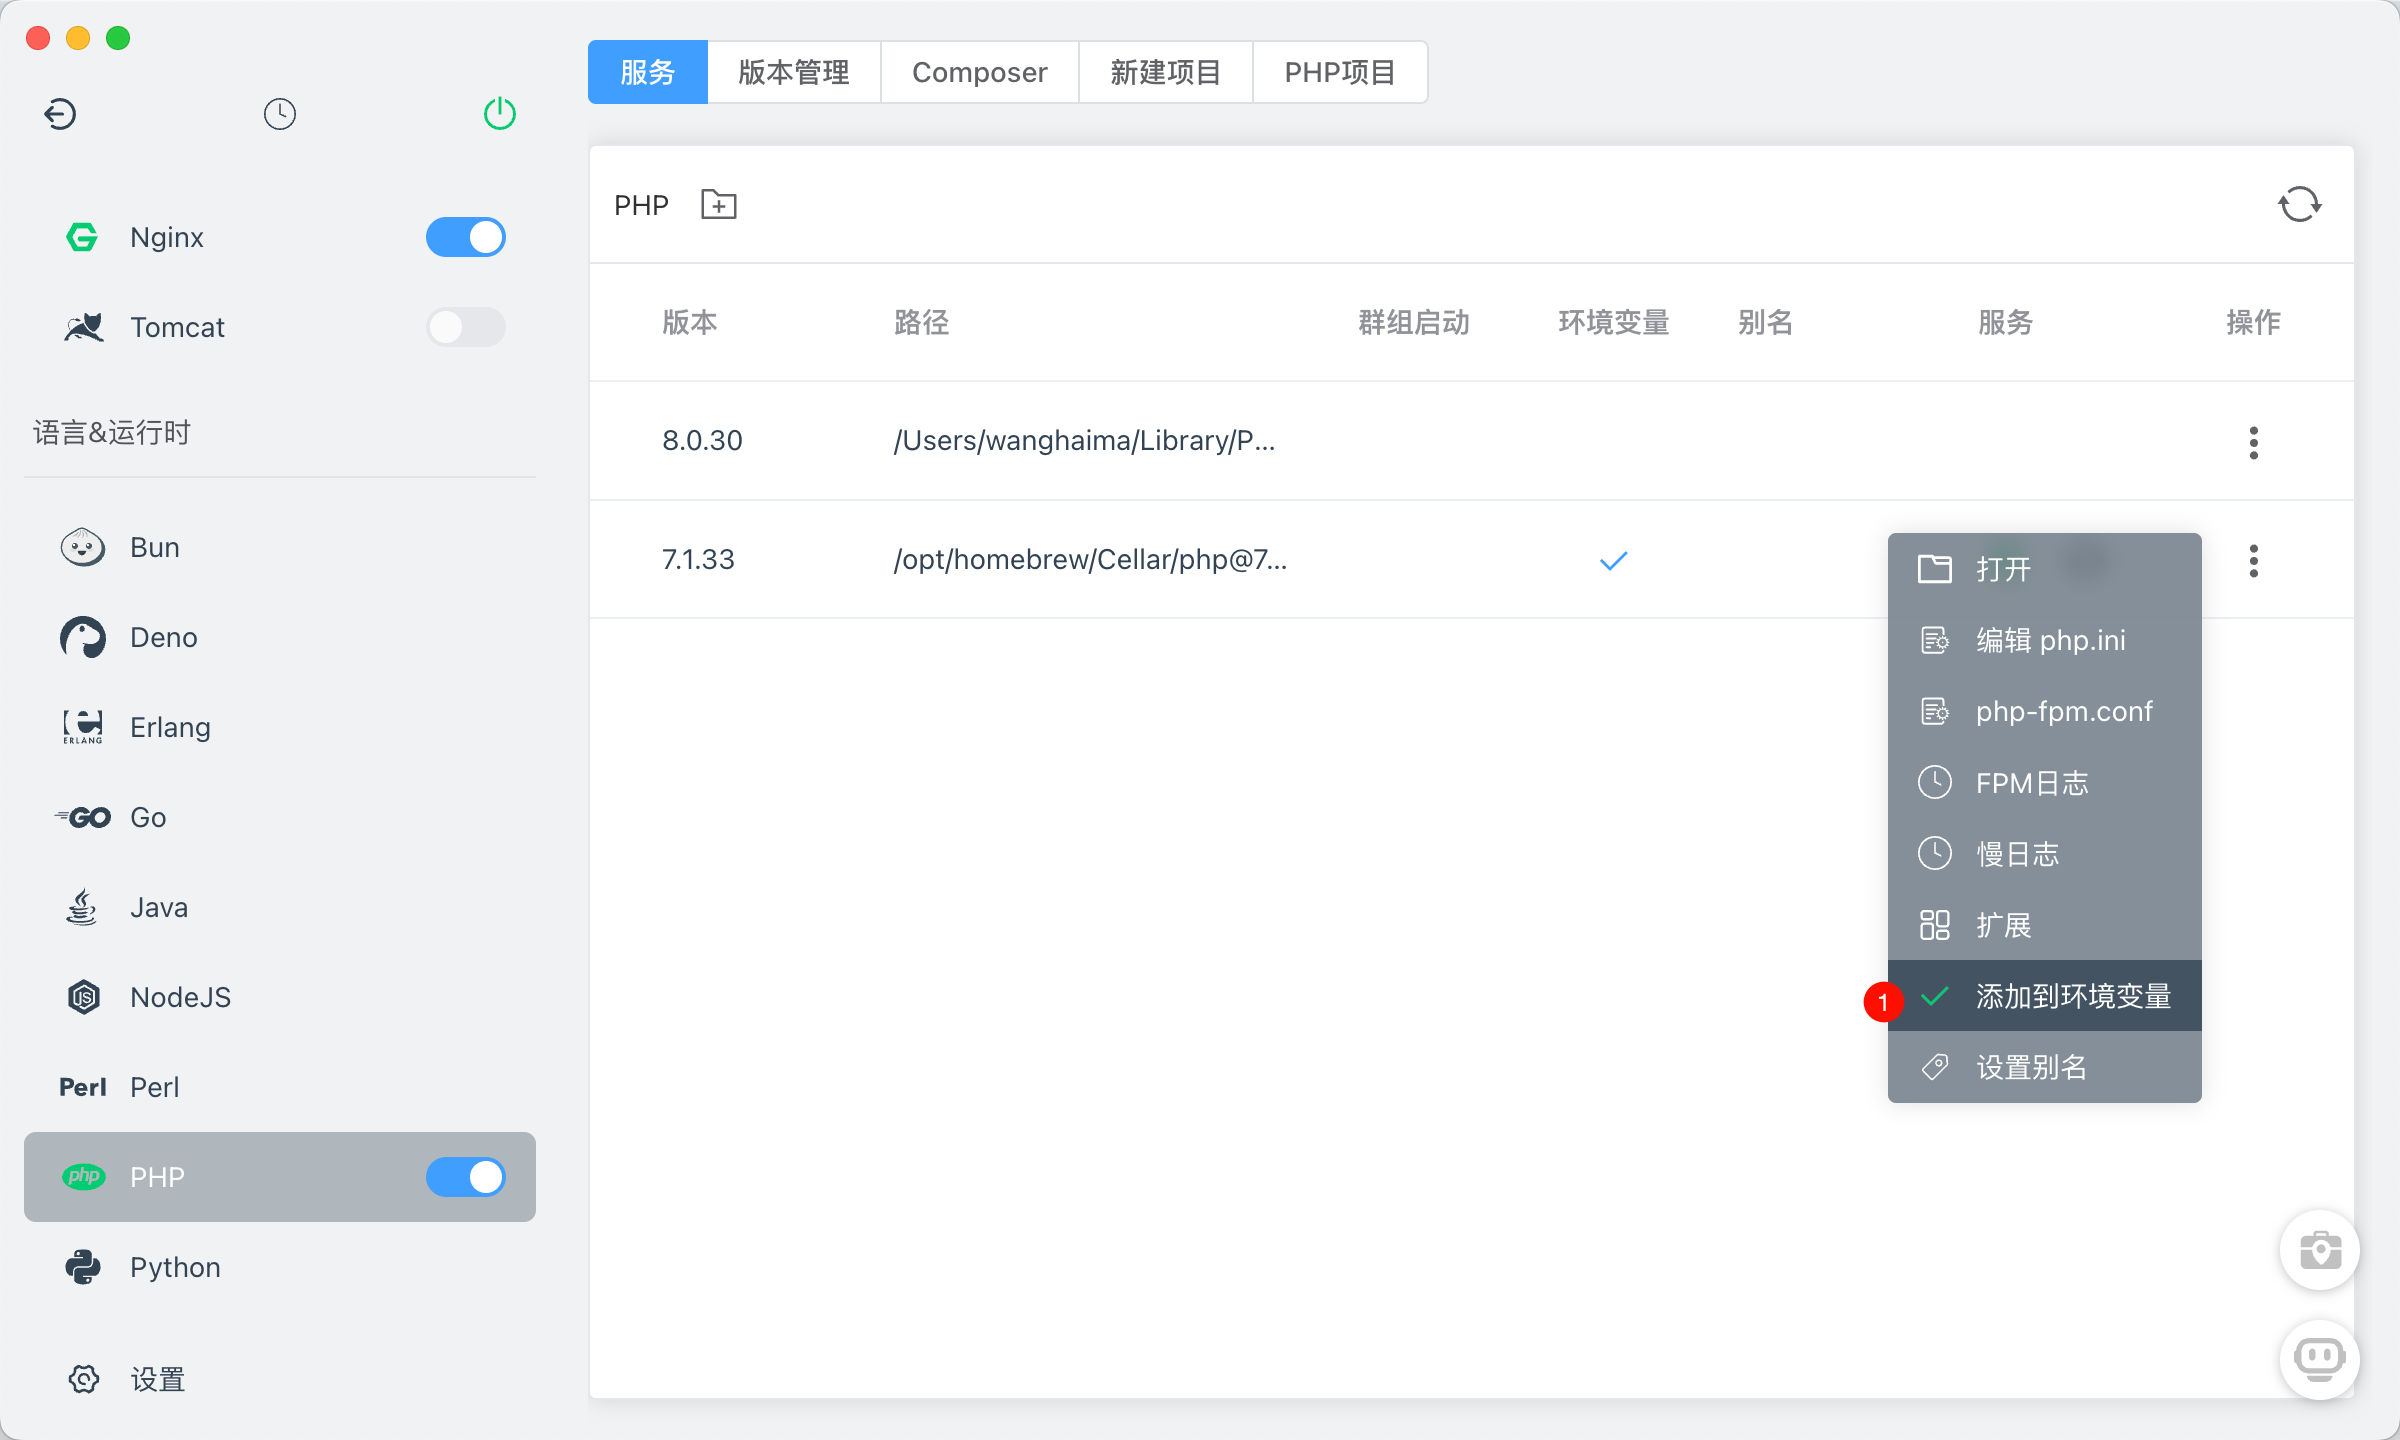
- 添加php到环境变量
wanghaima@wanghaimadeMacBook-Pro php % php -v
Failed loading /opt/homebrew/lib/php/pecl/20160303/xdebug.so:  dlopen(/opt/homebrew/lib/php/pecl/20160303/xdebug.so, 0x0009): tried: '/opt/homebrew/lib/php/pecl/20160303/xdebug.so' (no such file), '/System/Volumes/Preboot/Cryptexes/OS/opt/homebrew/lib/php/pecl/20160303/xdebug.so' (no such file), '/opt/homebrew/lib/php/pecl/20160303/xdebug.so' (no such file)
PHP 7.1.33 (cli) (built: Mar 31 2025 08:07:58) ( NTS )
Copyright (c) 1997-2018 The PHP Group
Zend Engine v3.1.0, Copyright (c) 1998-2018 Zend Technologies
 with Xdebug v2.9.8, Copyright (c) 2002-2020, by Derick Rethans
 with Zend OPcache v7.1.33, Copyright (c) 1999-2018, by Zend Technologies
环境变量的会自动写入到 ~/.zshrc 文件中
vim ~/.zshrc
export PATH="/Users/wanghaima/Library/PhpWebStudy/alias:/Users/wanghaima/Library/PhpWebStudy/env/golang:/Users/wanghaima/Library/PhpWebStudy/env/golang/bin:/Users/wanghaima/Library/PhpWebStudy/env/mysql:/Users/wanghaima/Library/PhpWebStudy/env/mysql/bin:/Users/wanghaima/Library/PhpWebStudy/env/php:/Users/wanghaima/Library/PhpWebStudy/env/php/bin:/Users/wanghaima/Library/PhpWebStudy/env/python:/Users/wanghaima/Library/PhpWebStudy/env/python/bin:$PATH"- 安装xdebug
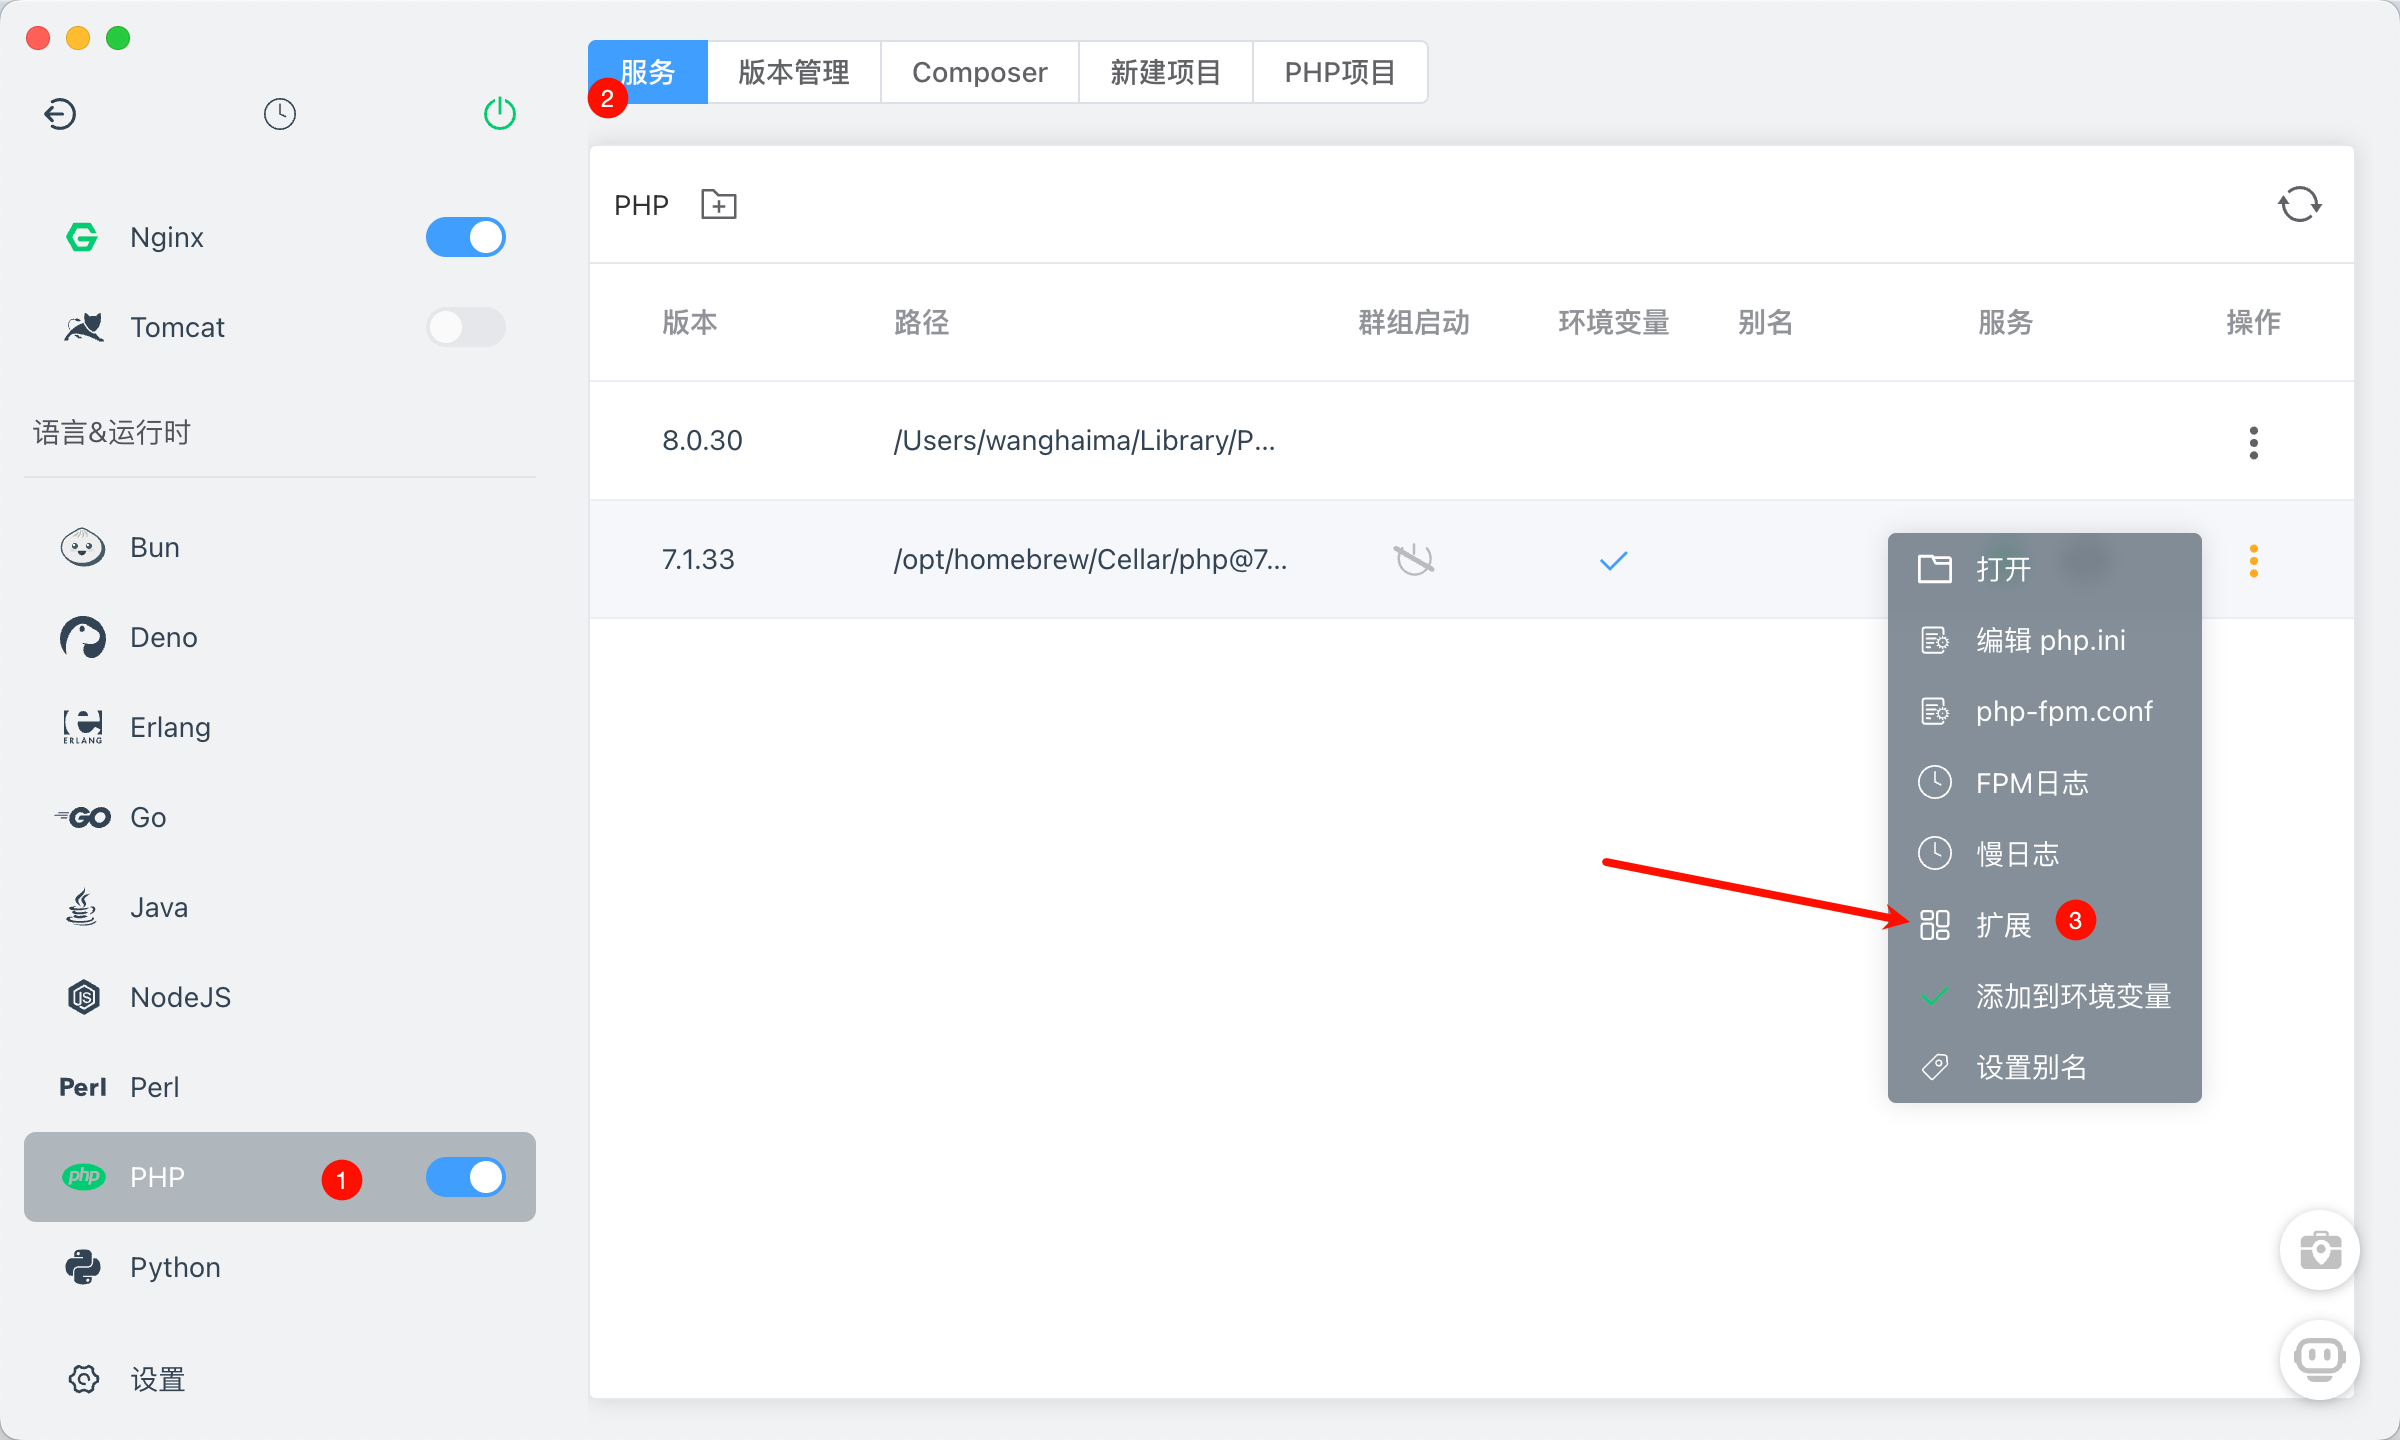
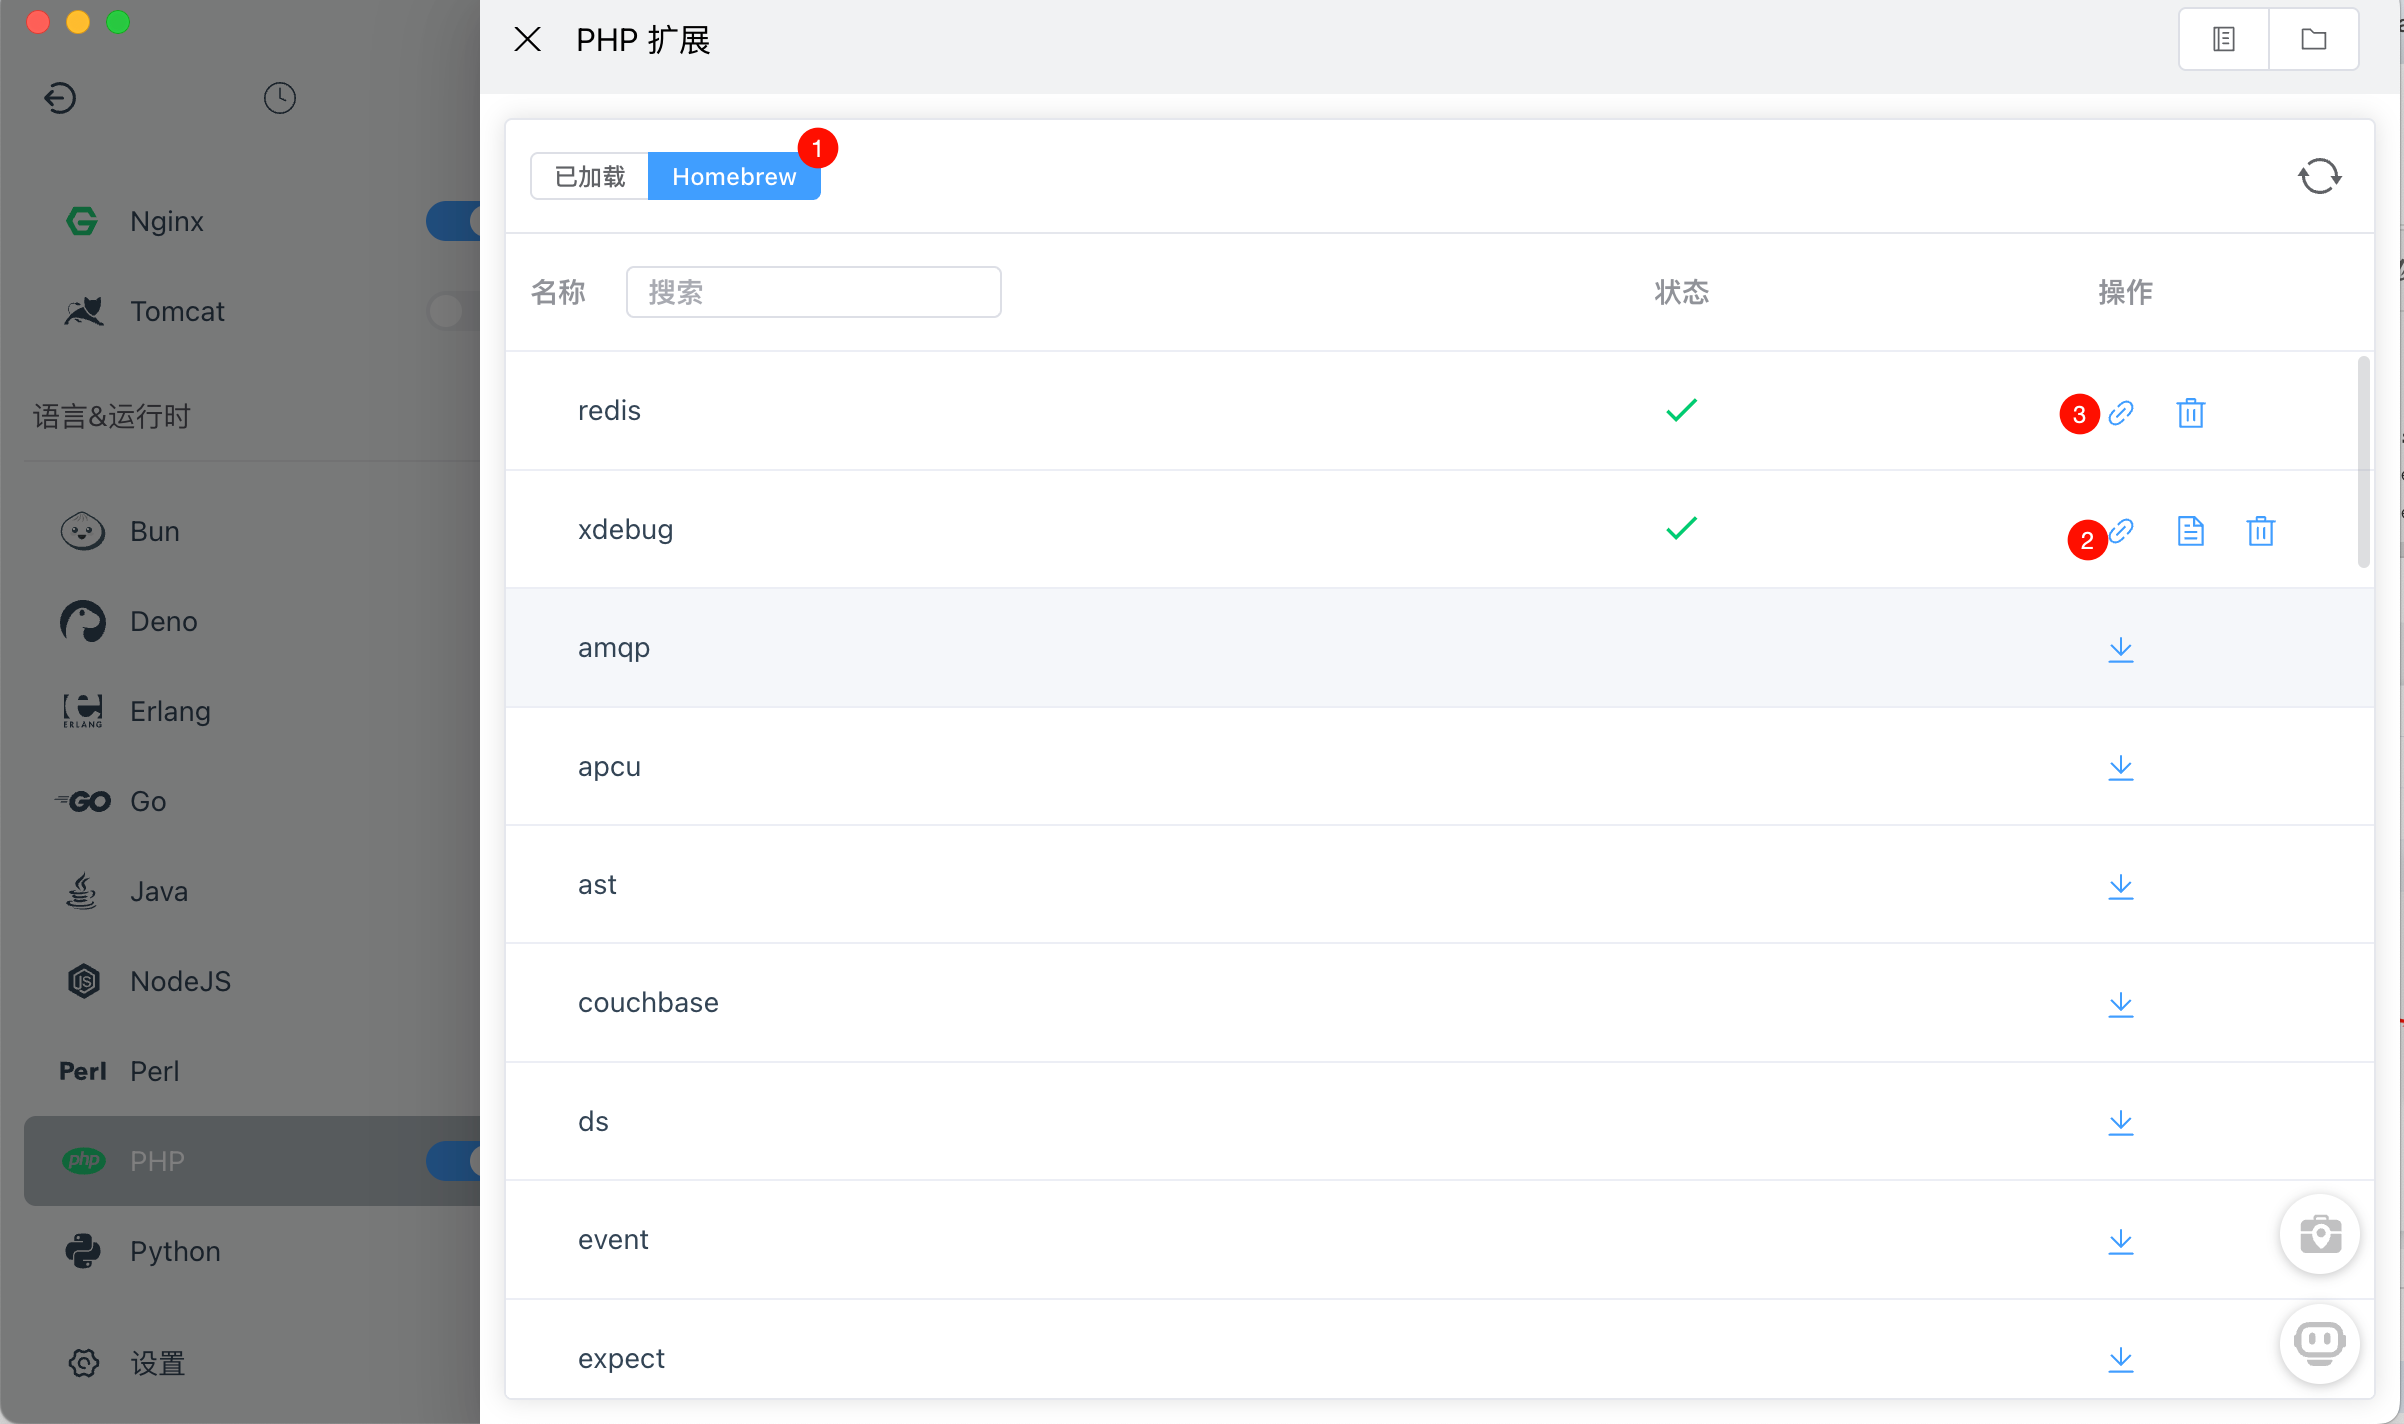
编辑 php.ini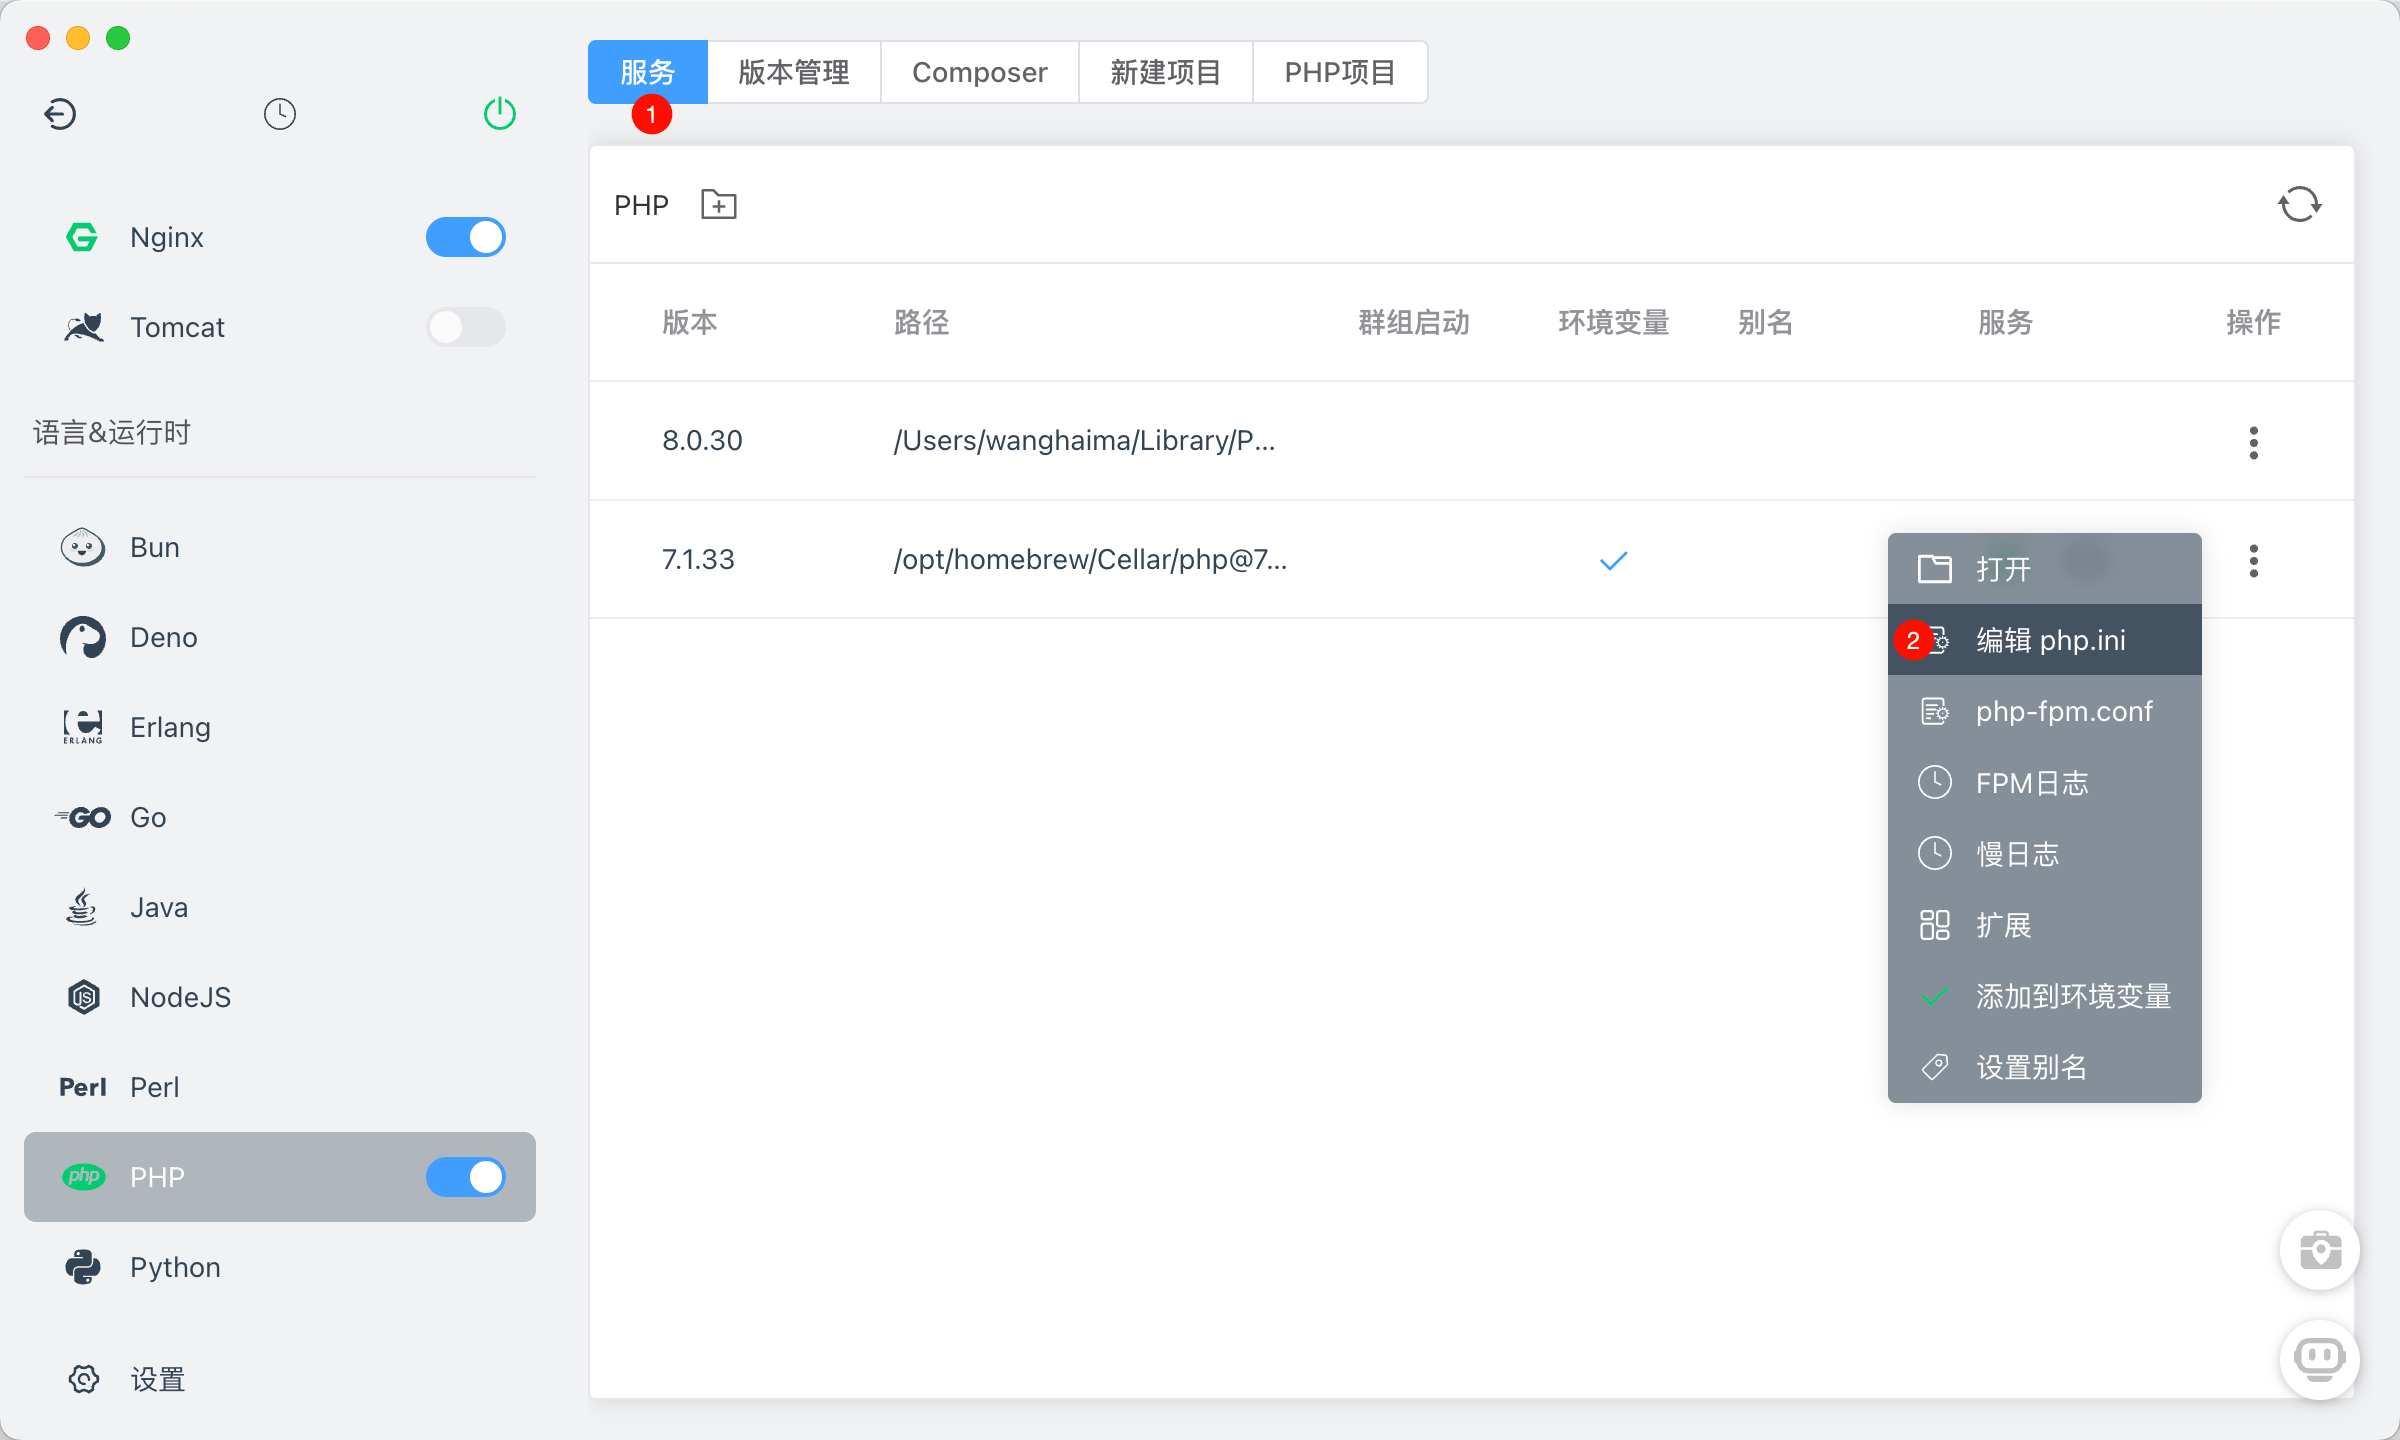
写到php.ini最下面,并保存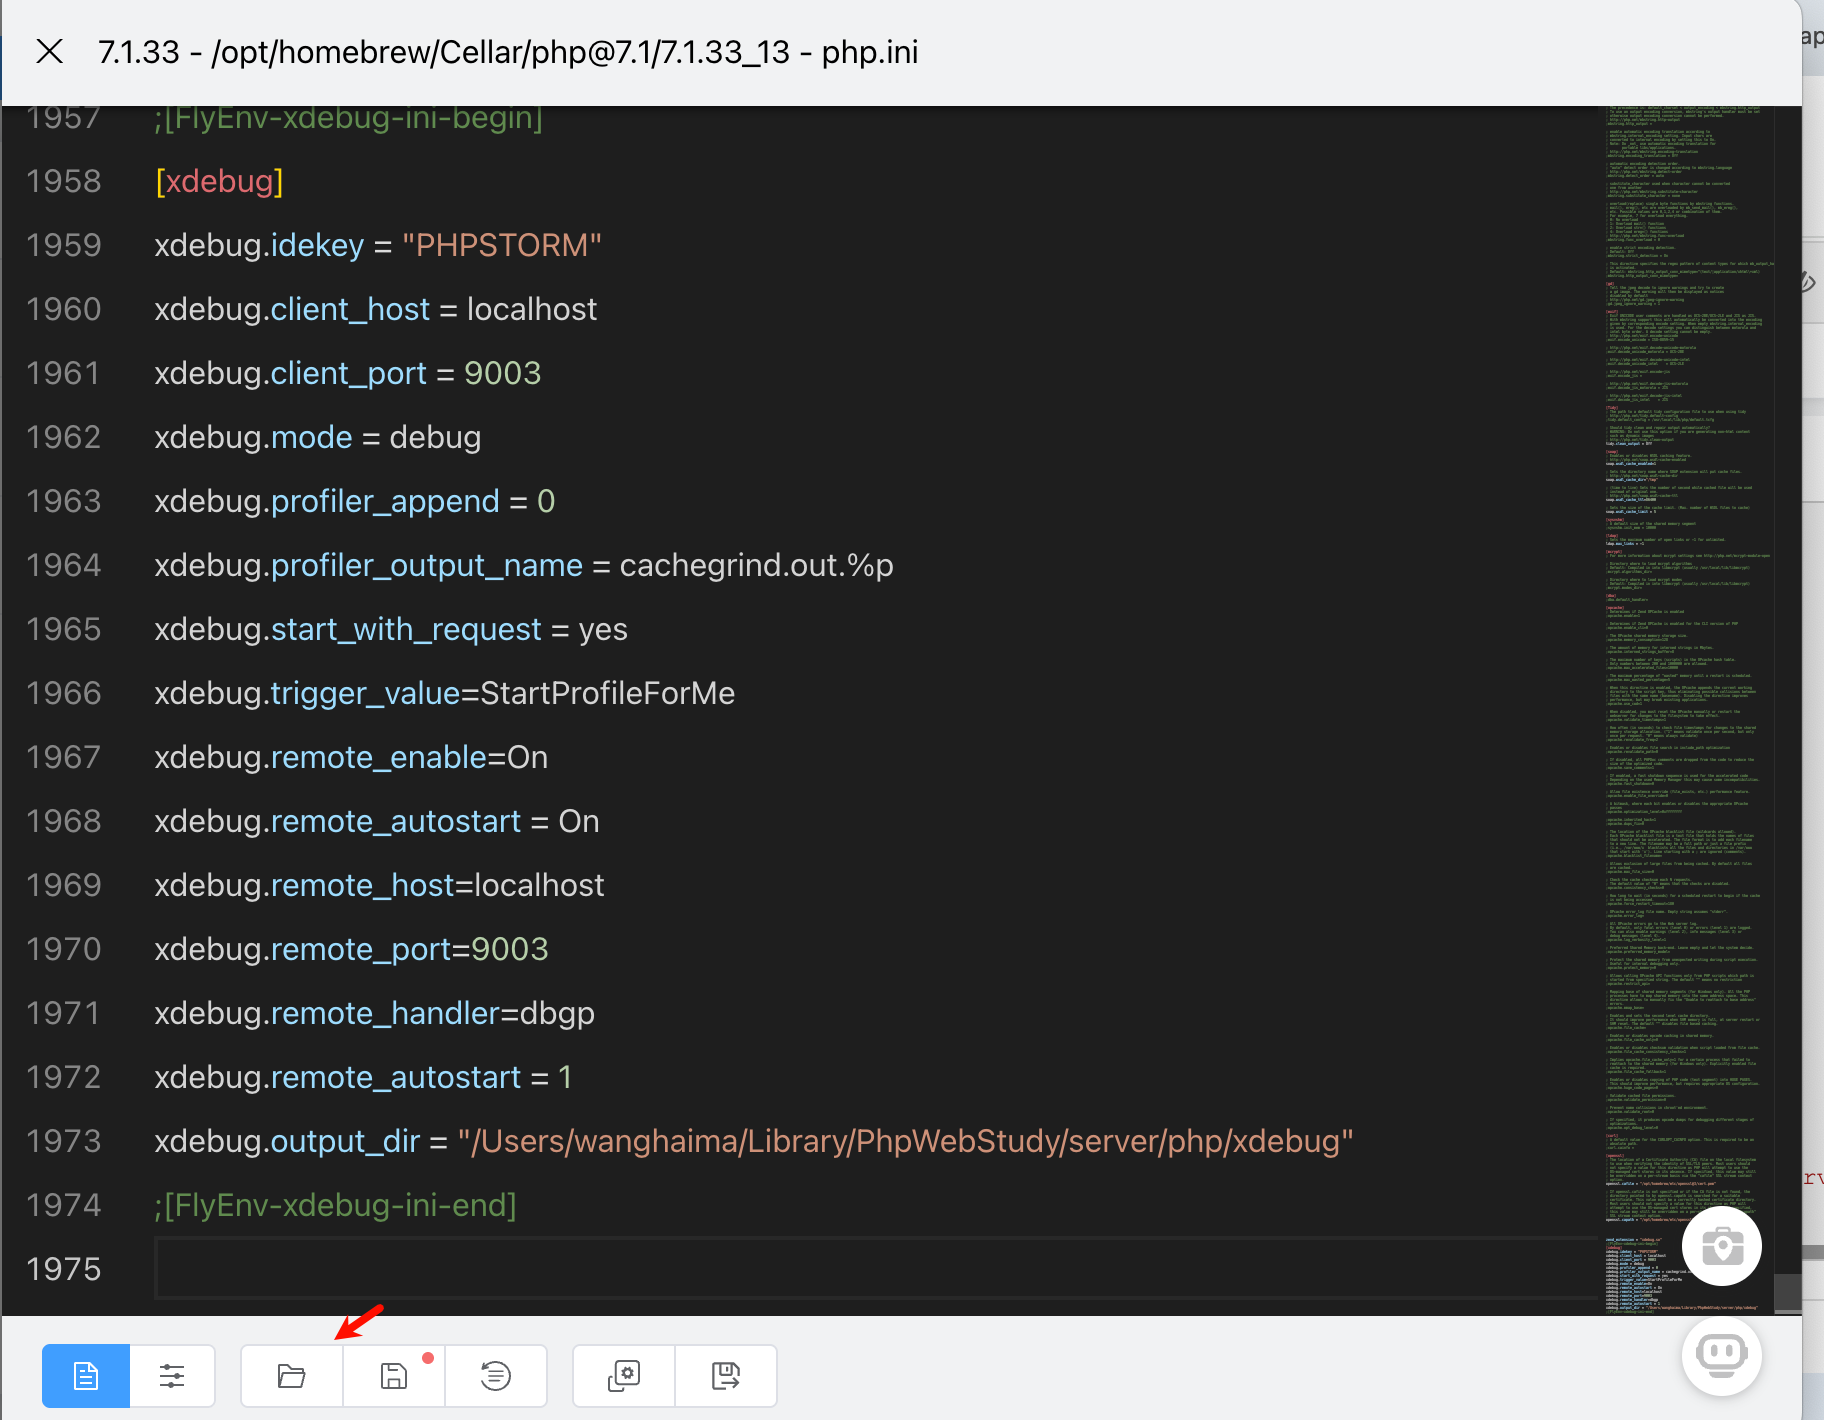
zend_extension = "xdebug.so"
;[FlyEnv-xdebug-ini-begin]
[xdebug]
xdebug.idekey = "PHPSTORM"
xdebug.client_host = localhost
xdebug.client_port = 9003
xdebug.mode = debug
xdebug.profiler_append = 0
xdebug.profiler_output_name = cachegrind.out.%p
xdebug.start_with_request = yes
xdebug.trigger_value=StartProfileForMe
xdebug.remote_enable=On
xdebug.remote_autostart = On
xdebug.remote_host=localhost
xdebug.remote_port=9003
xdebug.remote_handler=dbgp
xdebug.remote_autostart = 1
xdebug.output_dir = "/Users/wanghaima/Library/PhpWebStudy/server/php/xdebug"
;[FlyEnv-xdebug-ini-end]- 配置vscode
4.1 打开settings.json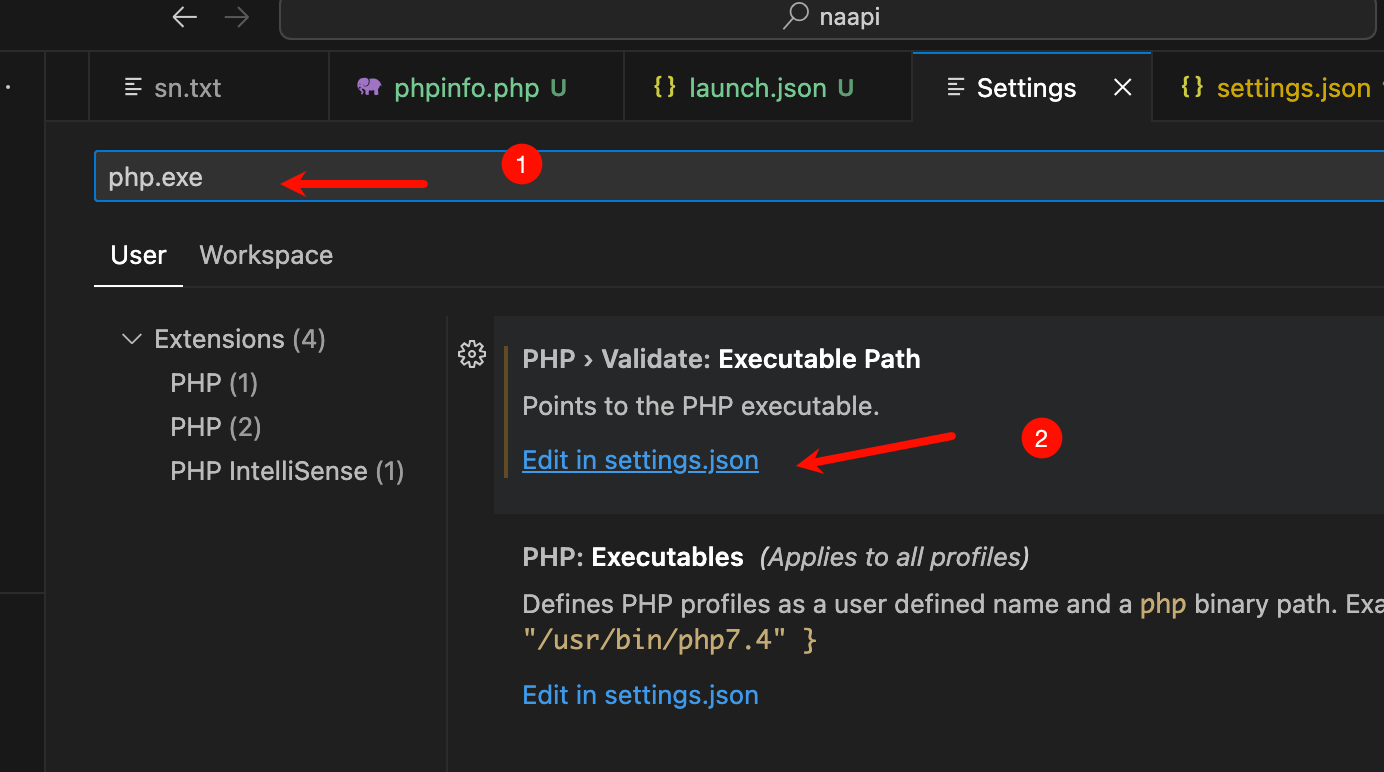
写入下成配置
    "php.executablePath": "/opt/homebrew/Cellar/php@7.1/7.1.33_13/bin/php",
    "php.validate.executablePath" : "/opt/homebrew/Cellar/php@7.1/7.1.33_13/bin/php",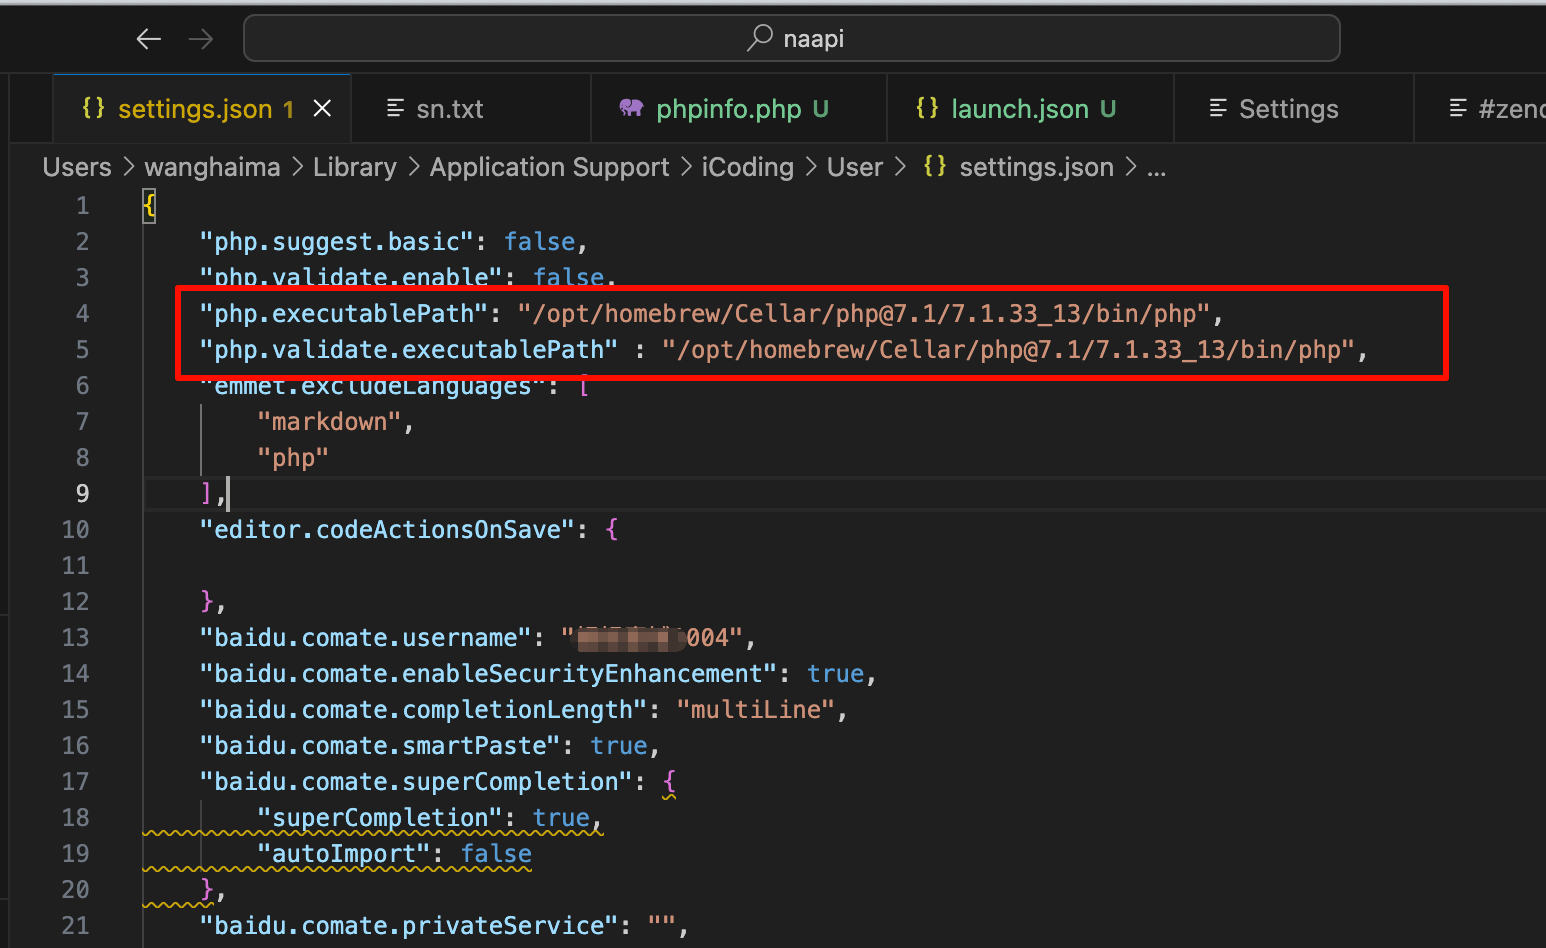
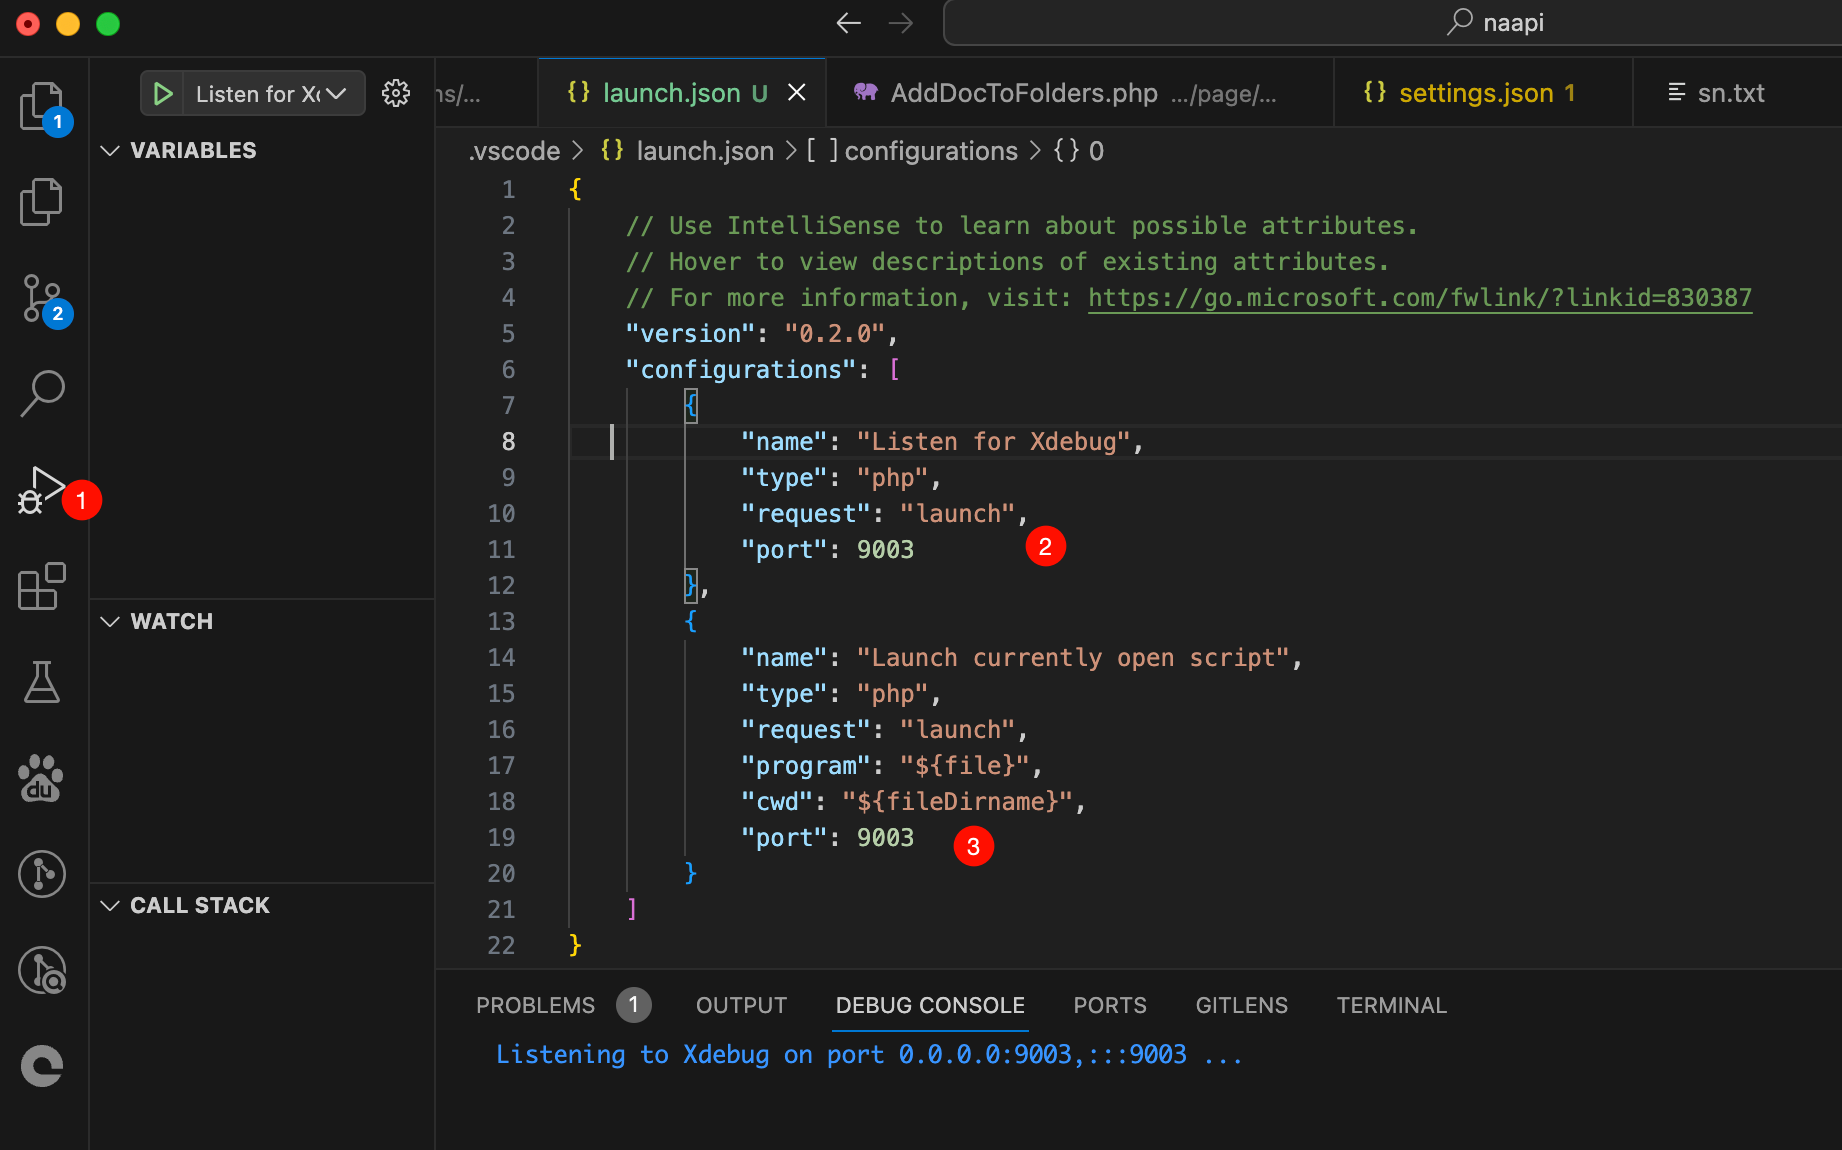
4.2 打开debug插件,创建launch.json文件
写入下面的配置
{
    // Use IntelliSense to learn about possible attributes.
    // Hover to view descriptions of existing attributes.
    // For more information, visit: https://go.microsoft.com/fwlink/?linkid=830387
    "version": "0.2.0",
    "configurations": [
        {
            "name": "Listen for Xdebug",
            "type": "php",
            "request": "launch",
            "port": 9003
        },
        {
            "name": "Launch currently open script",
            "type": "php",
            "request": "launch",
            "program": "${file}",
            "cwd": "${fileDirname}",
            "port": 9003
        }
    ]
}
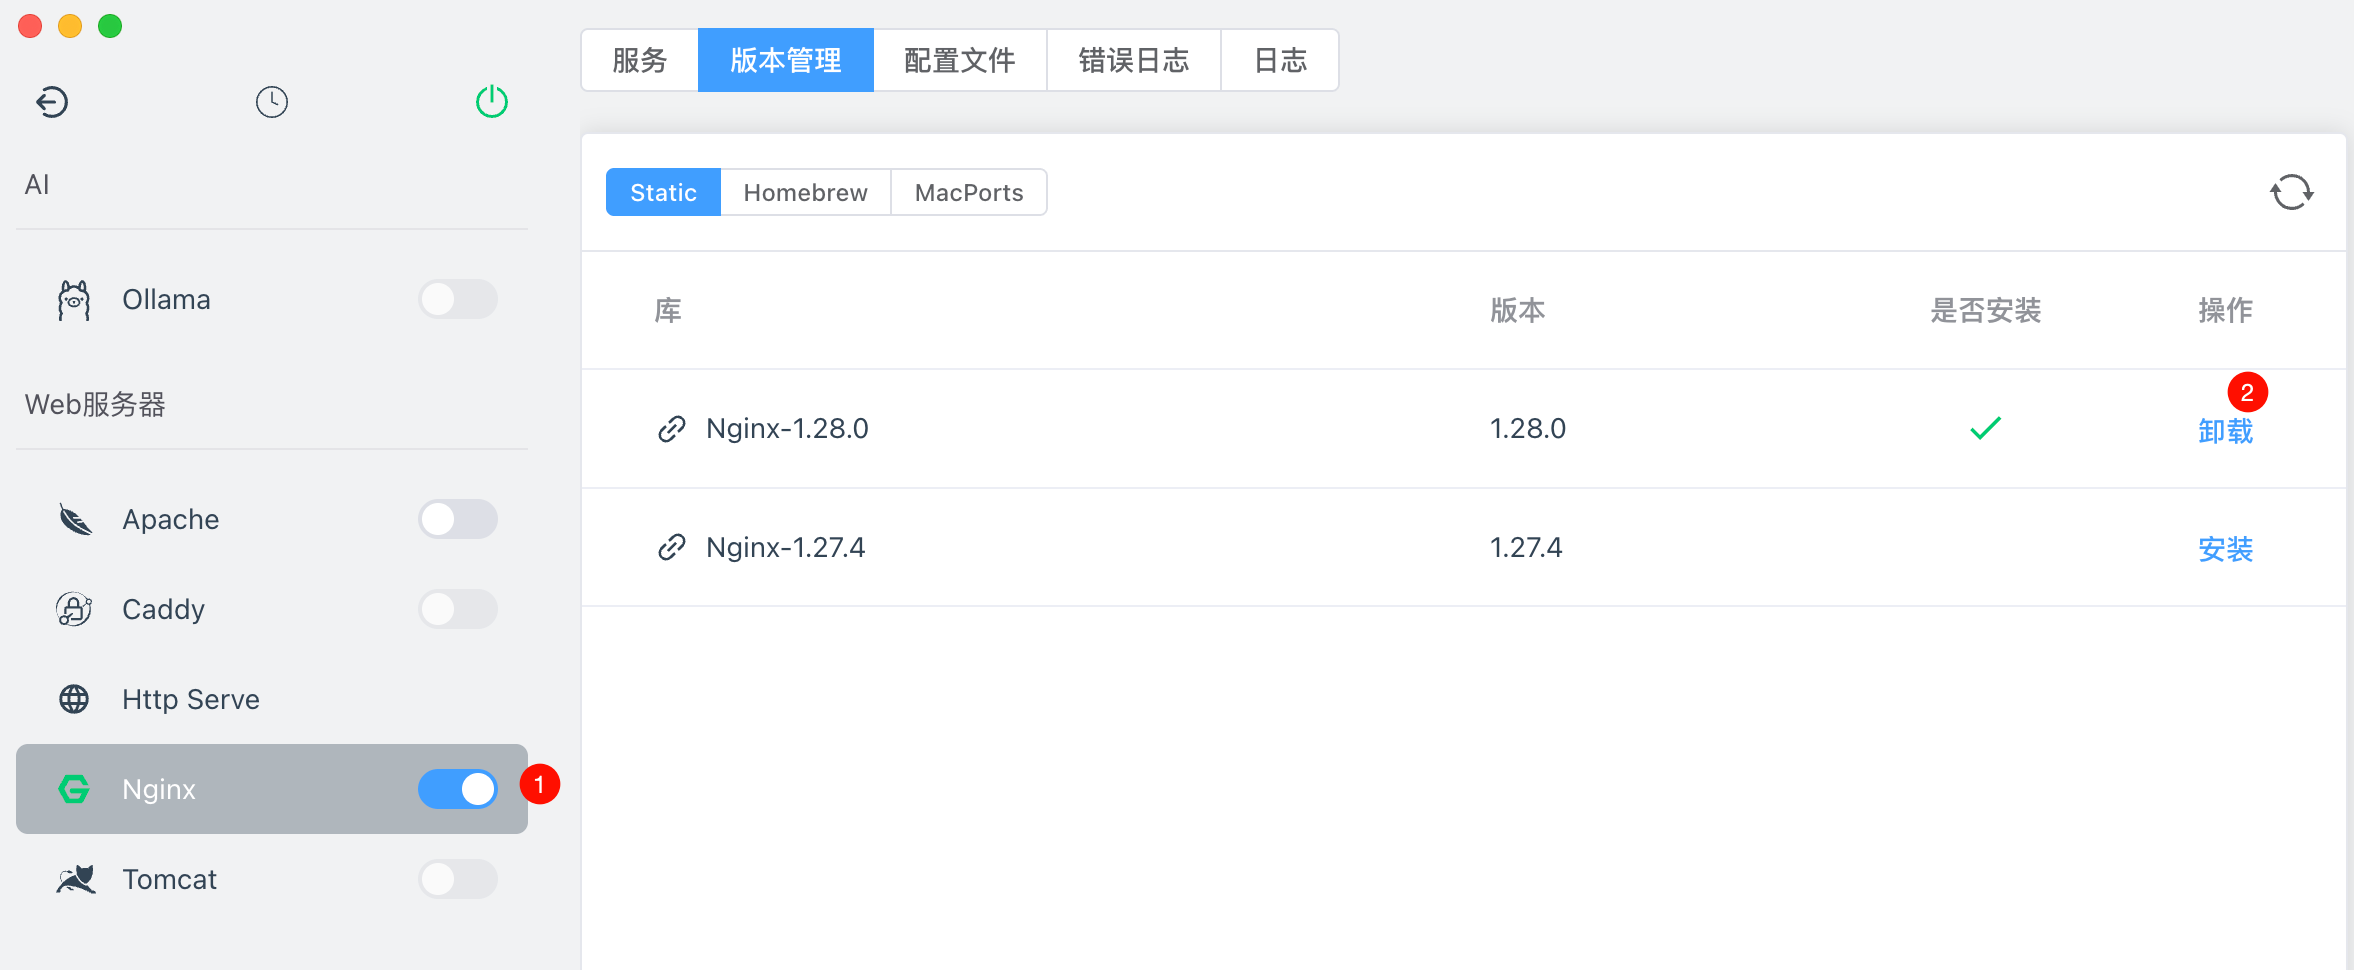
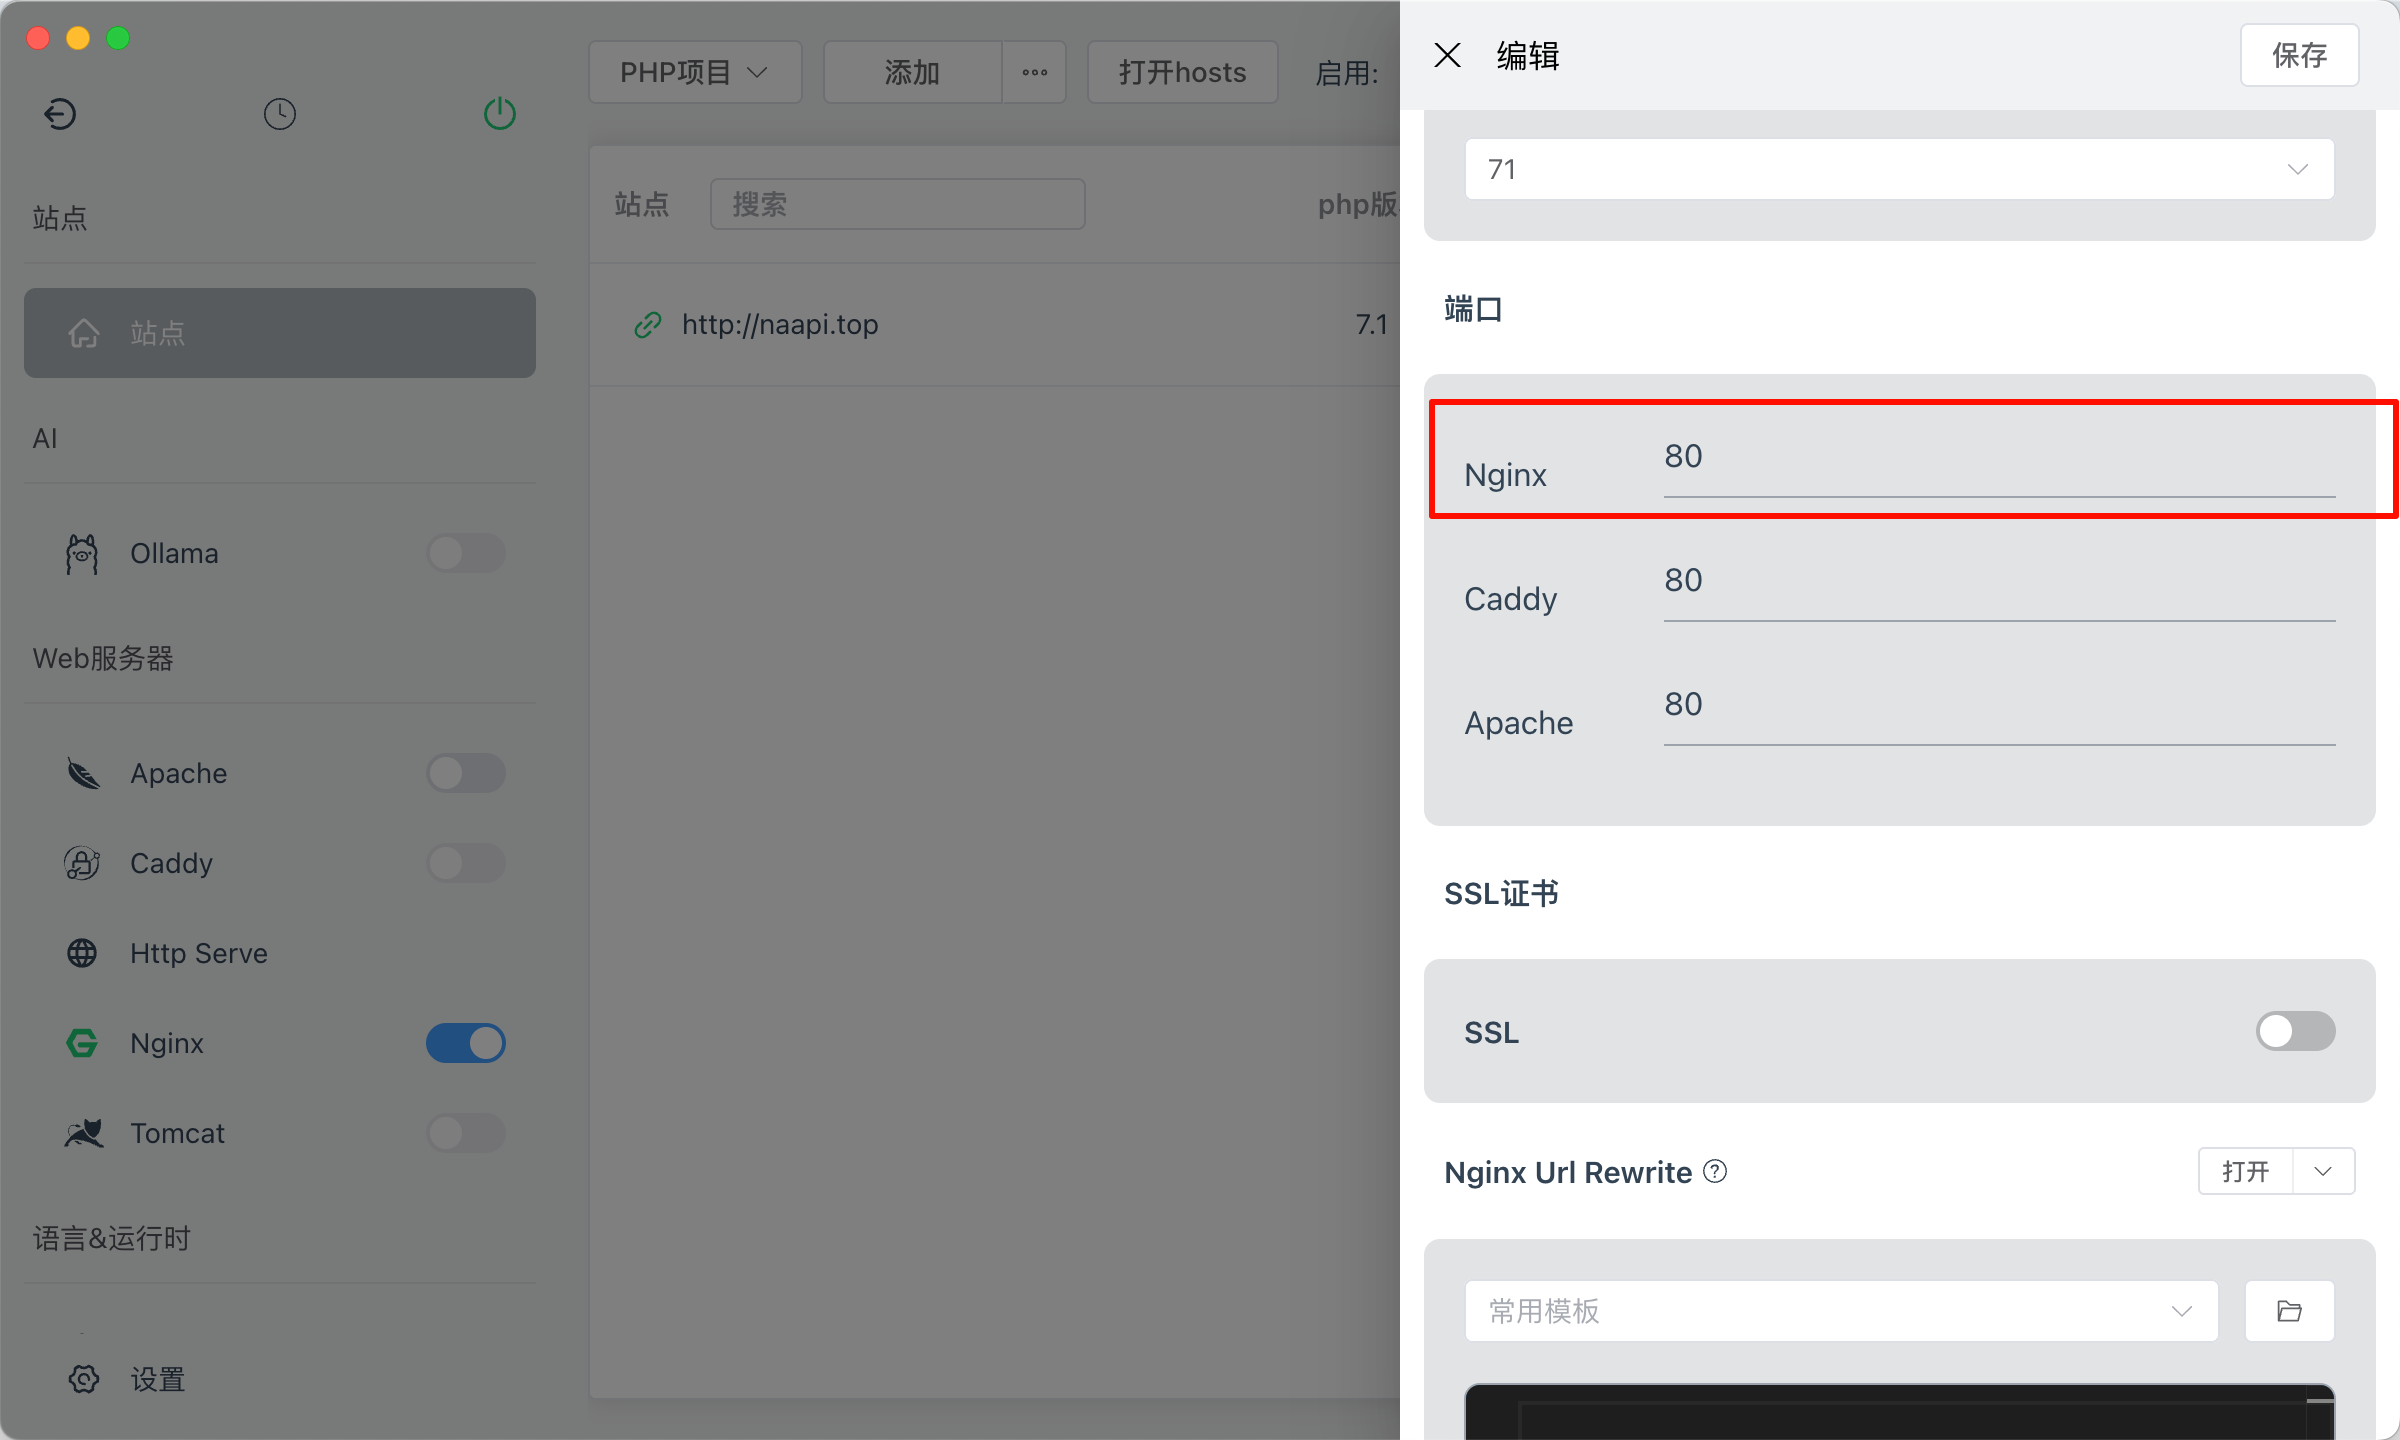
安装nginx
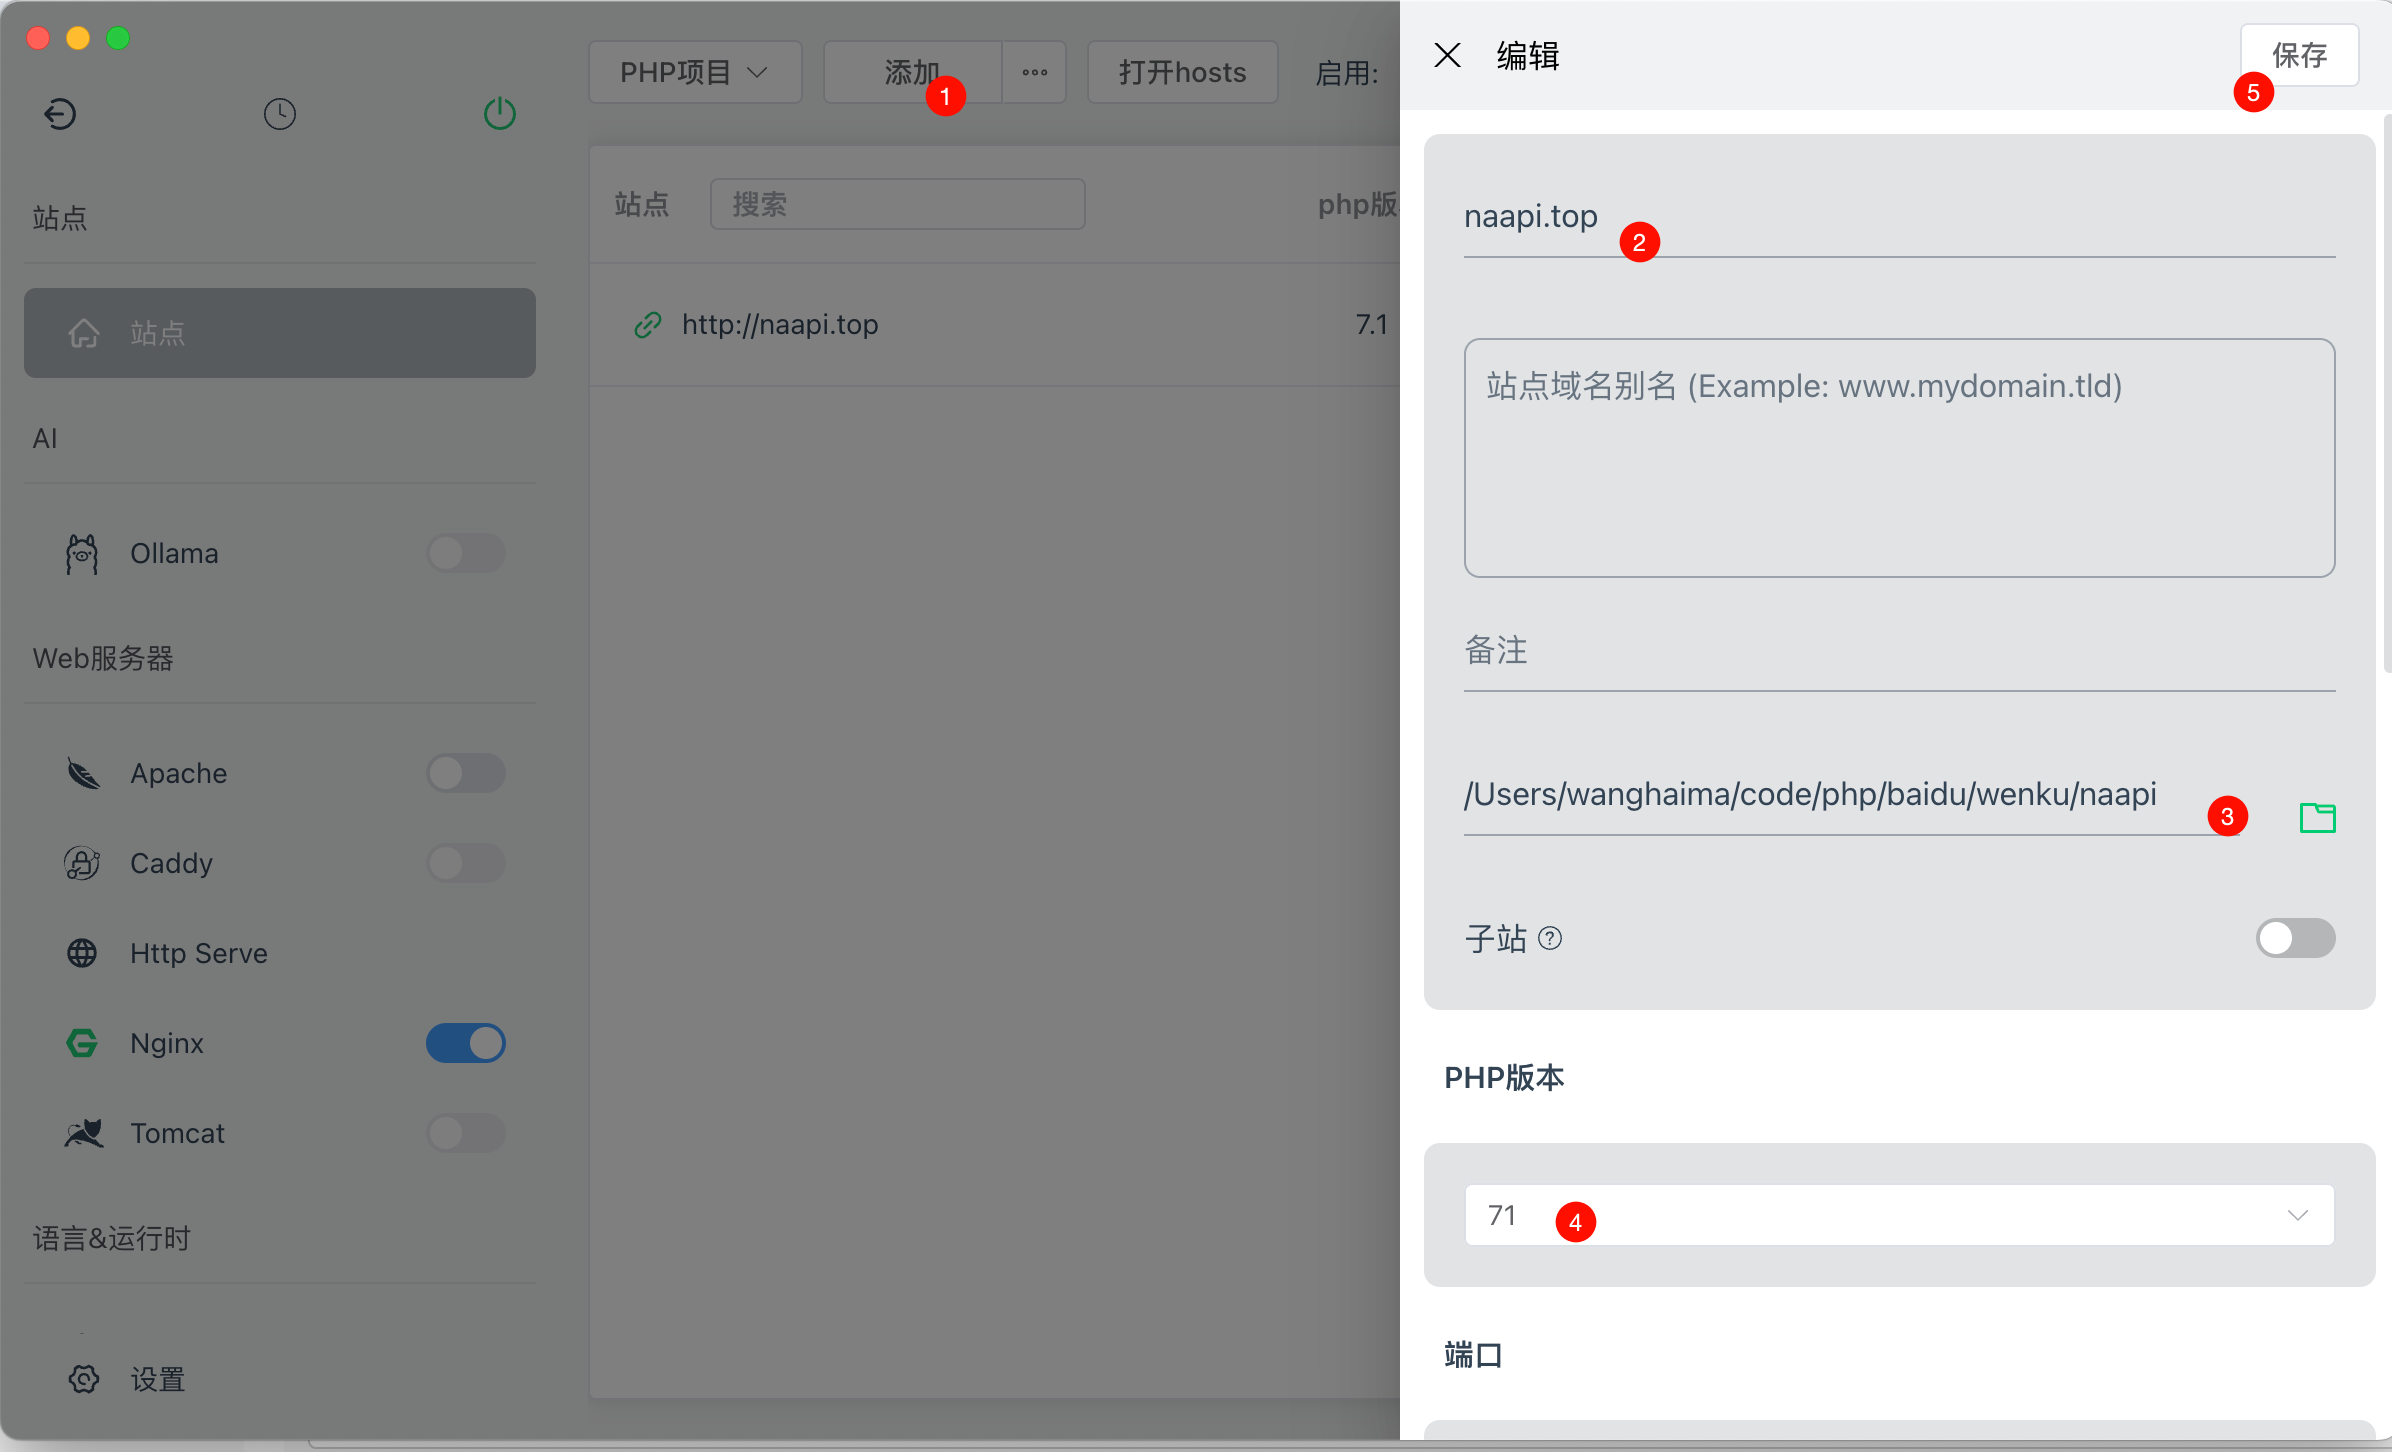
添加站点
新建phpinfo.php文件
<?php
$name = "test phpinfo";
echo "hellow $name";
phpinfo();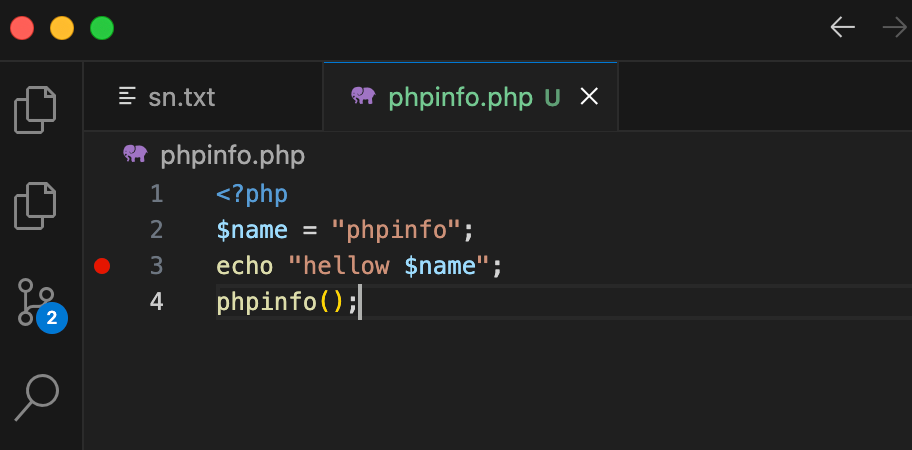
浏览器访问
http://naapi.top/phpinfo.php
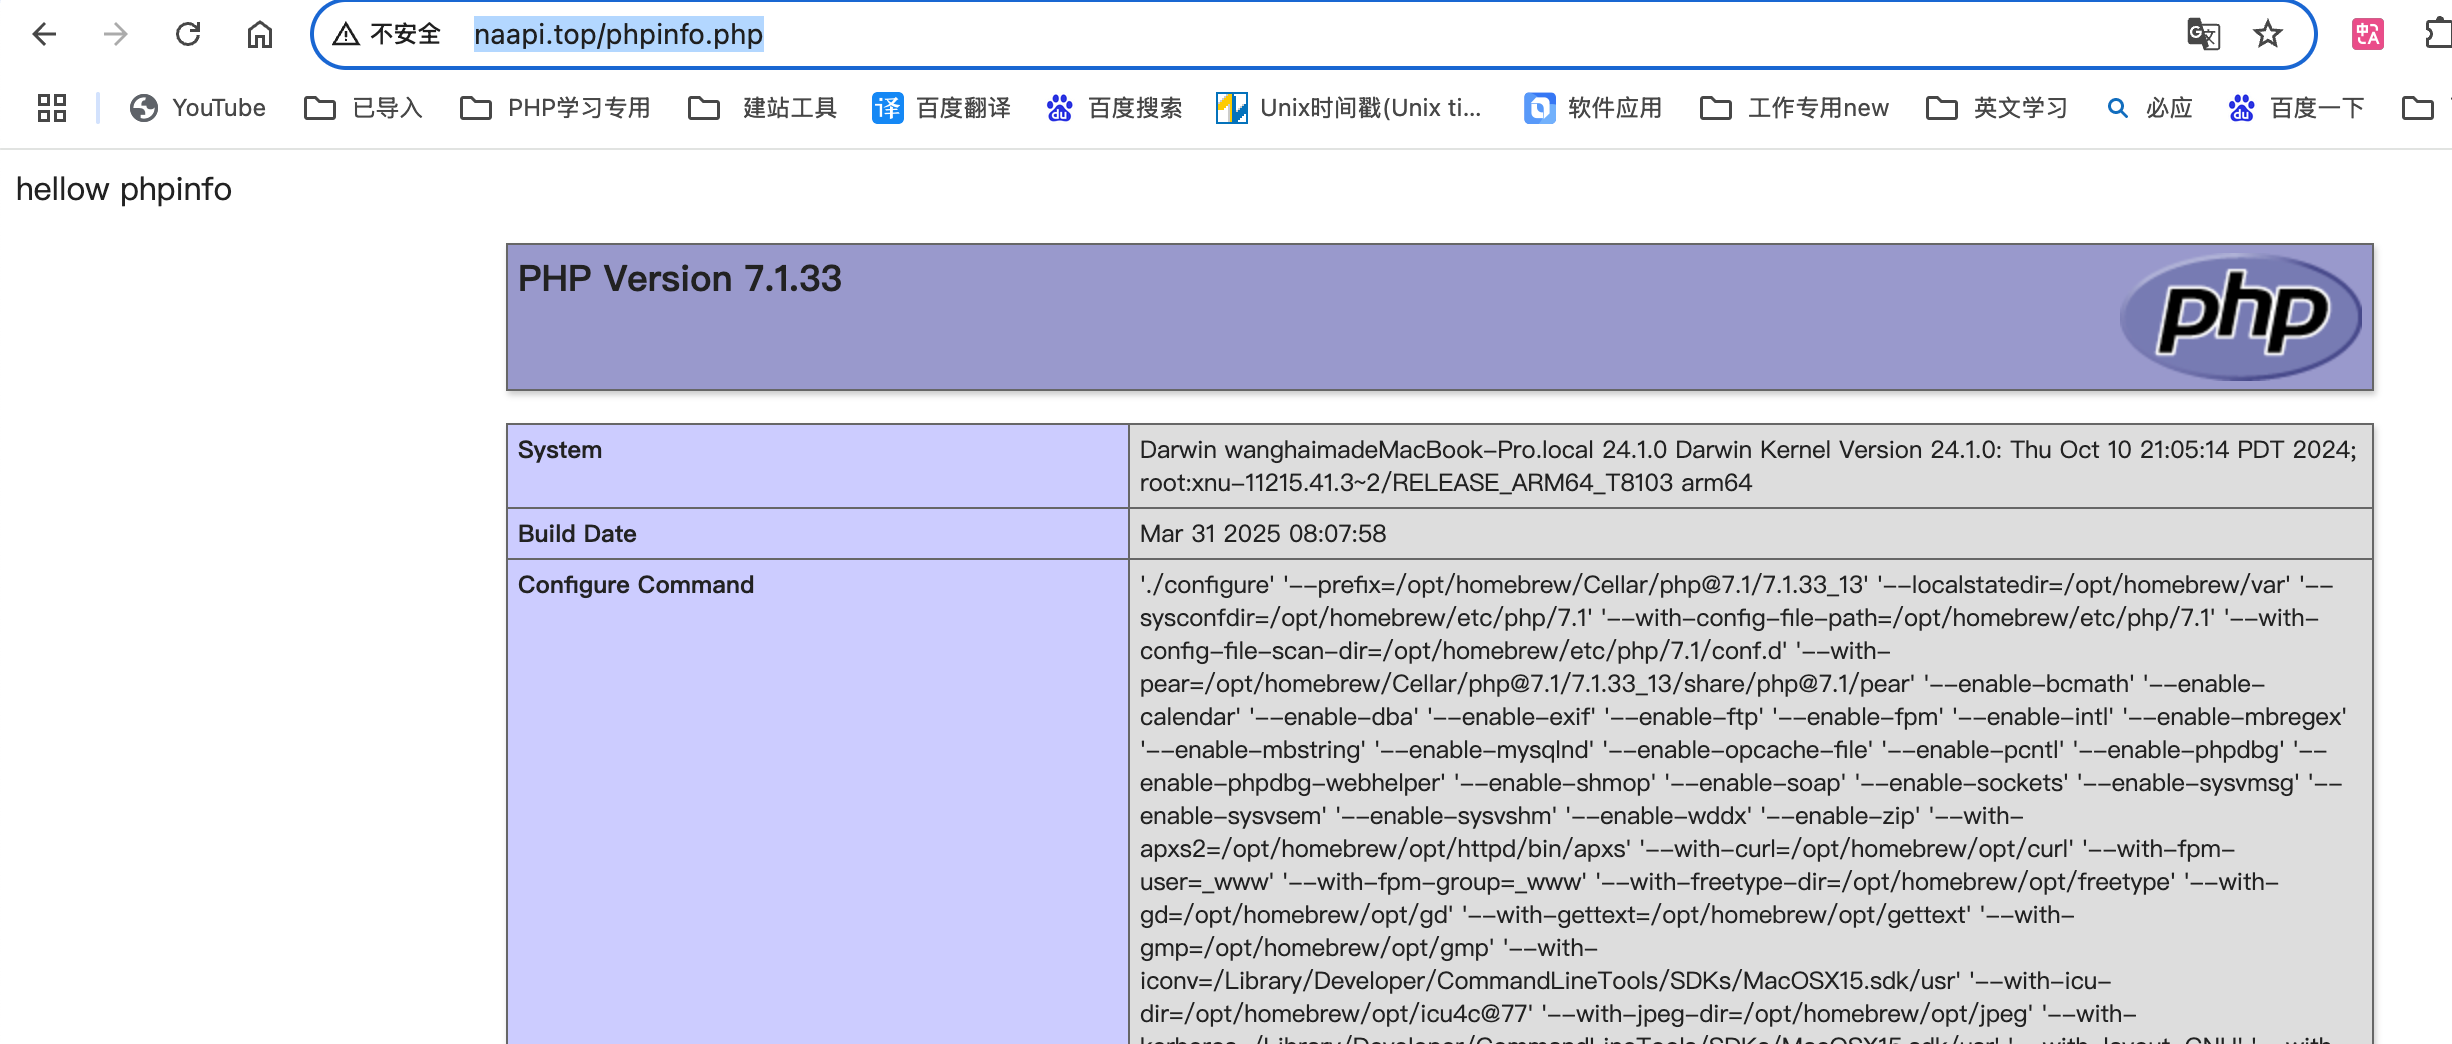
可以看到已经有xdebug信息了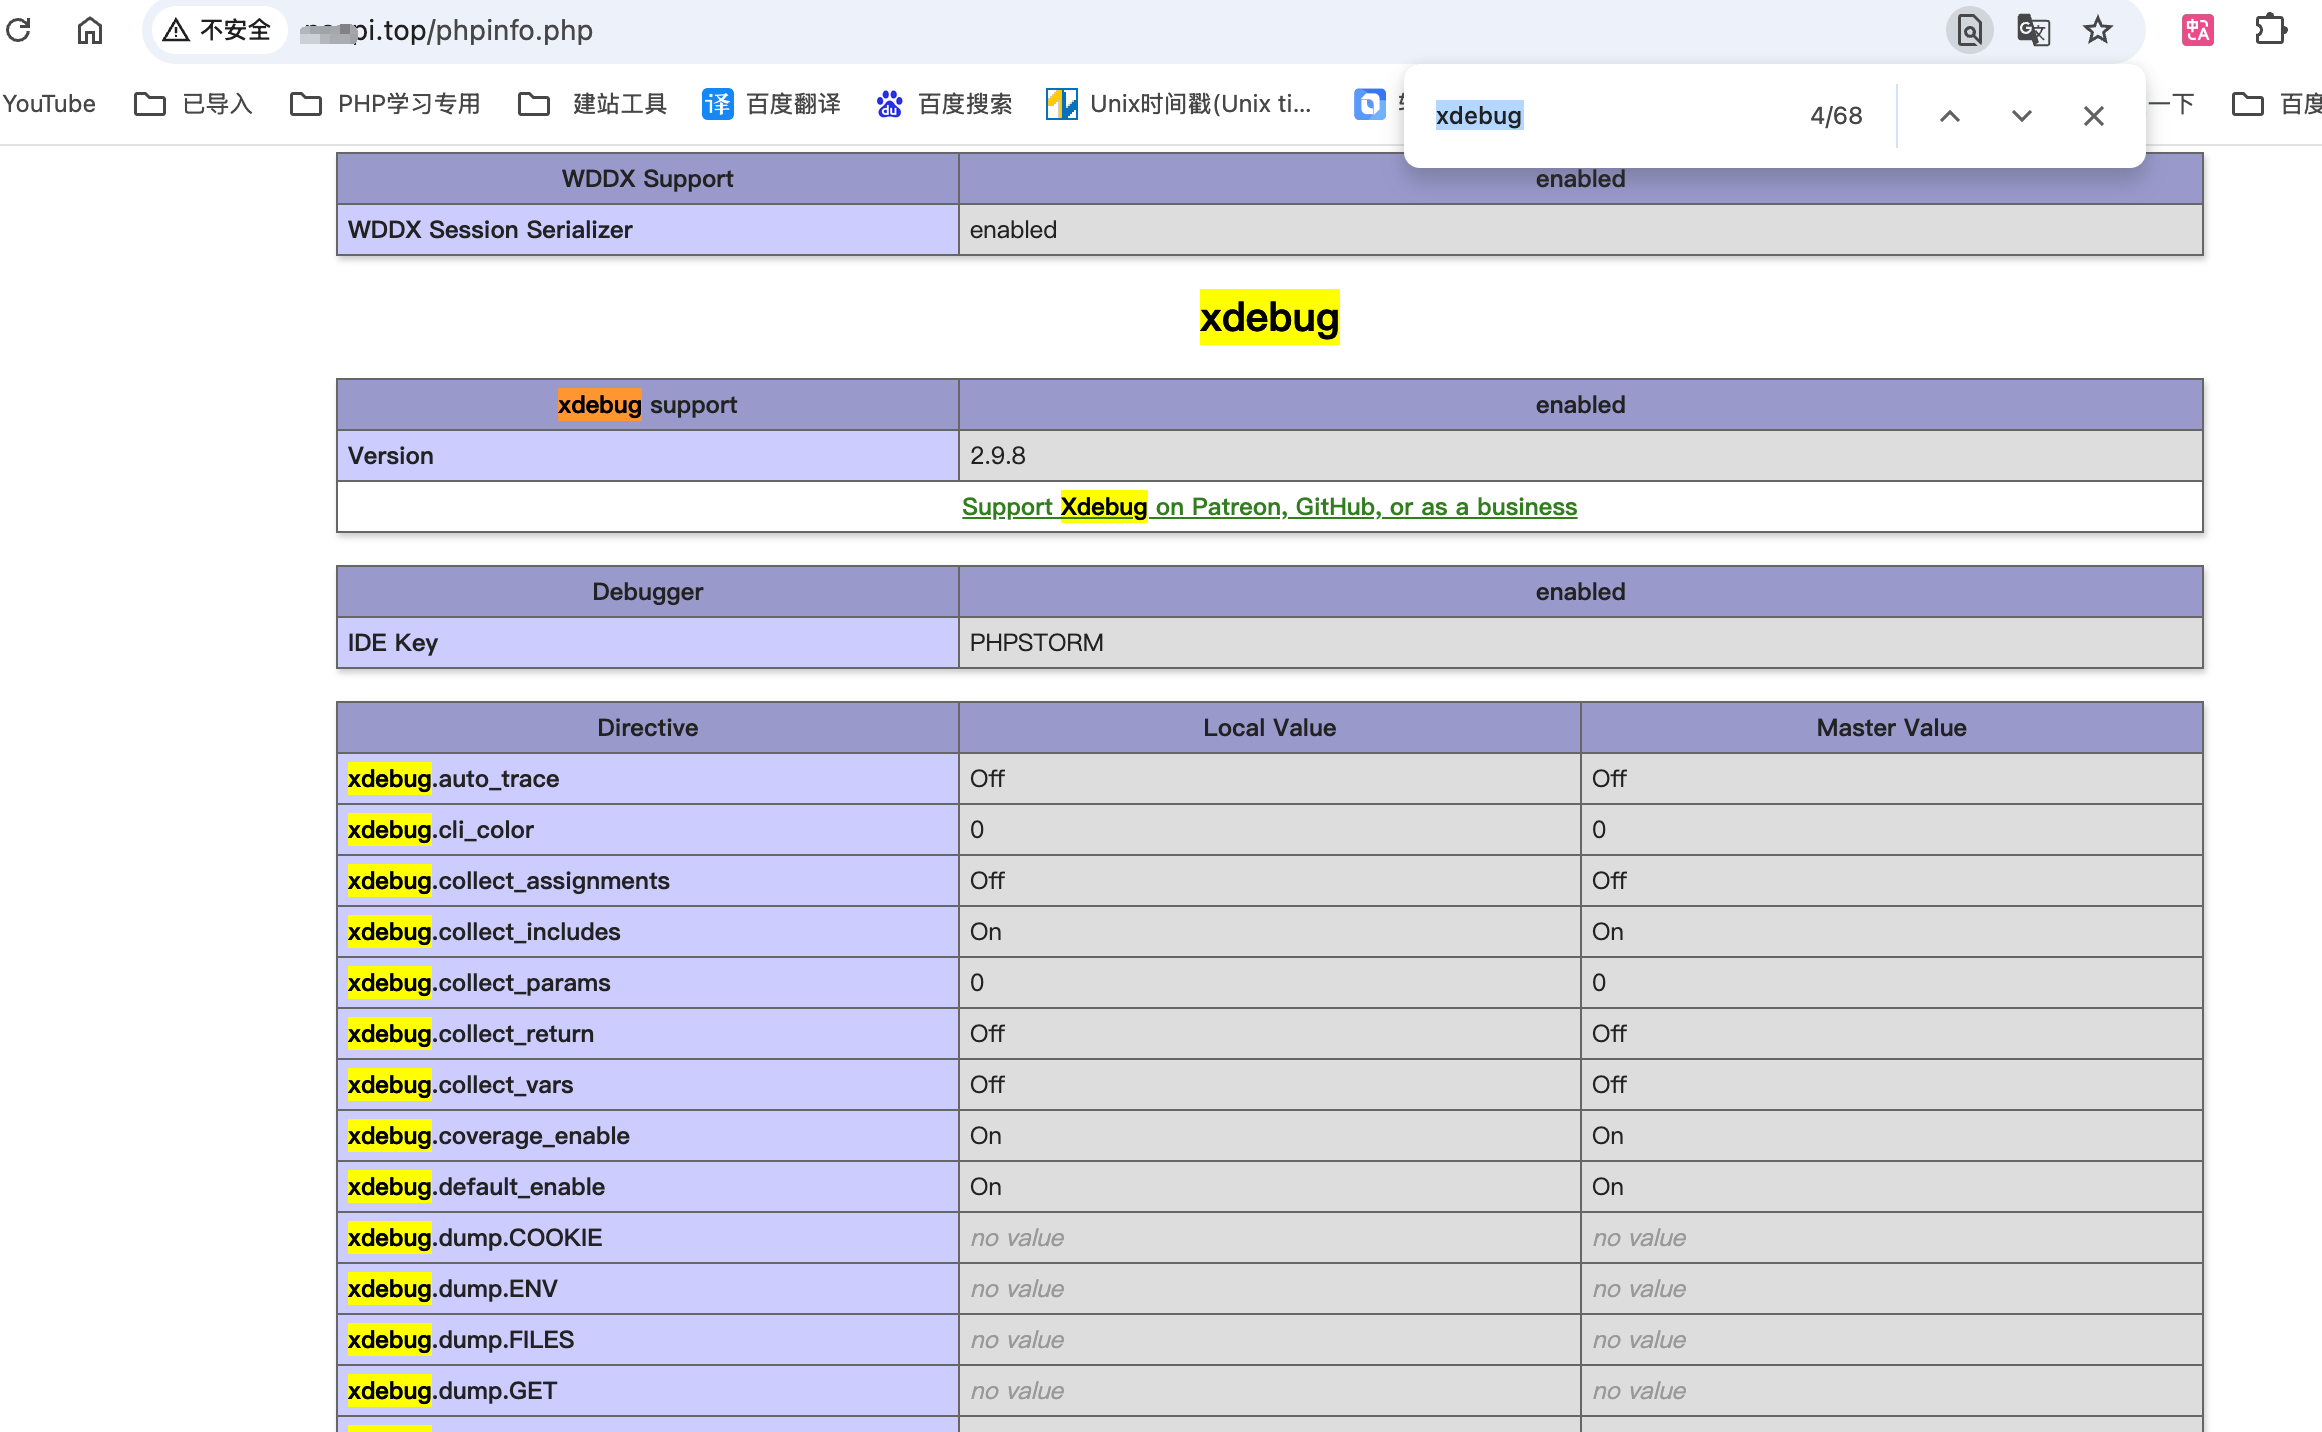
测试debug
- 打断点,记到debug
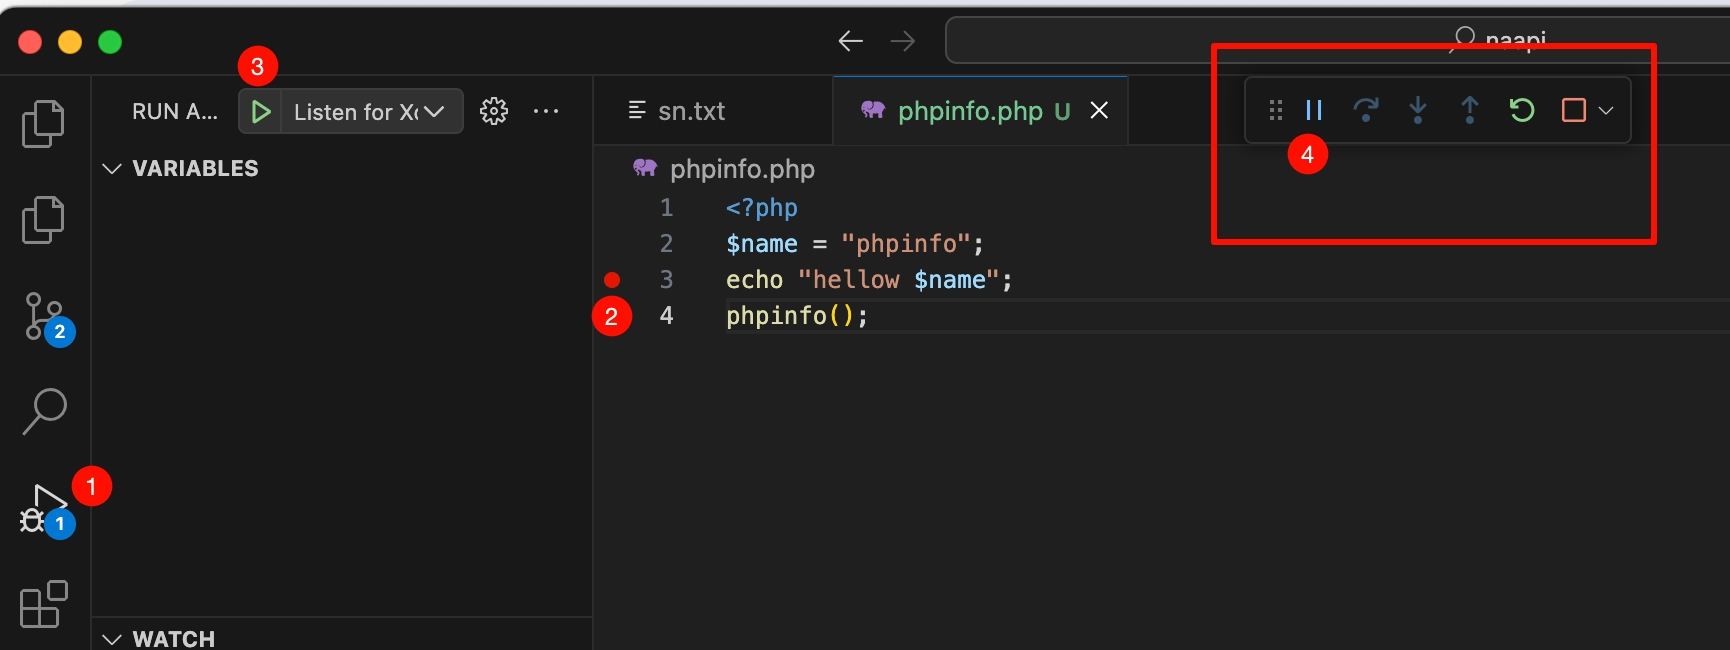
- 刷新页面
浏览器访问
http://naapi.top/phpinfo.php - 可以看到已经进么断点
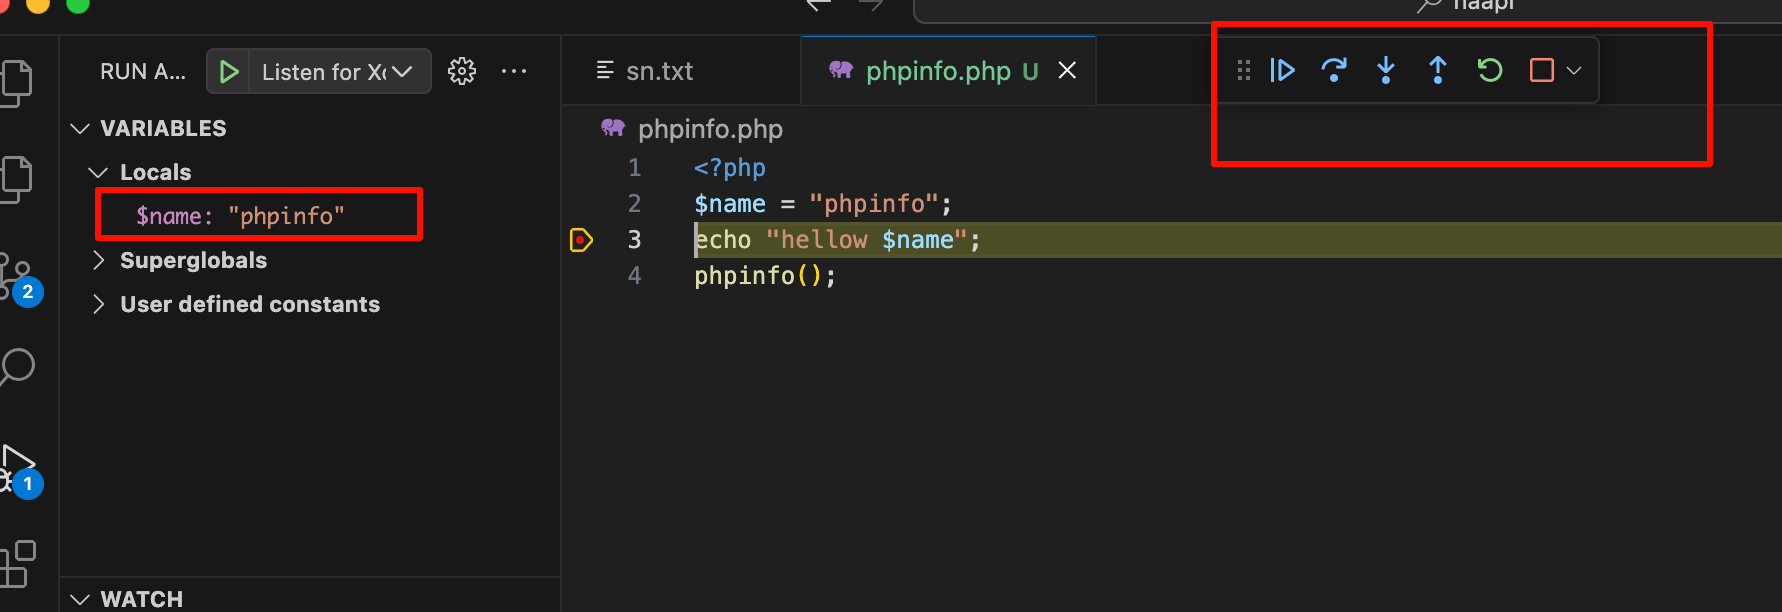
至此结束
